 PAFworks
Create a form and collect answers
A form is a file in your PAFworks Files. You build it by placing questions on a page, or let the assistant draft it from one sentence. Publish it with a link or embed it in your website: anyone can answer, without an account. The answers arrive as charts, as a table and, if you wish, in an Excel workbook that fills itself.
This guide follows Alice, at Acme, as she builds the Quote request form of the company's website: a few questions about the visitor, their project and their budget, photos or plans to upload, and an optional discovery call to book.
Before you start
- A PAFworks account that can write in the folder where the form will live: your own Files, or a team share where you have Write or Admin rights.
- To draft the form with the assistant: an administrator must have switched the assistant on and given it an AI model, see Set up the assistant for your organisation.
- For the e-mails a form sends (codes to respondents, answers to you, the invitation of a booked slot): the organisation's Outgoing mail, which an administrator sets up in Admin › Mail and meetings.
- For a question that books an appointment: a booking page of your own in the calendar, see Let people book a meeting or pick a date.
Step 1 — Create the form
-
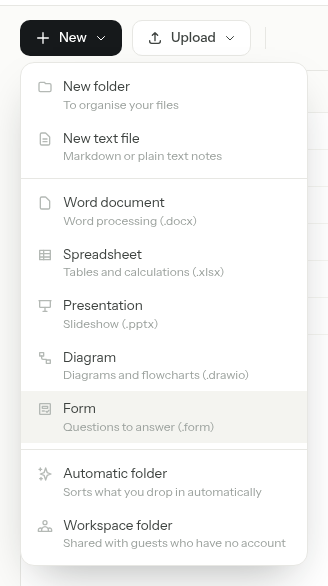
In Files, open the folder where the form should live, here Projects. Click New, then Form.
-
Type a name, such as
Quote request, and click Create. The file is calledQuote request.form, and its name becomes the form's title, which you can change later.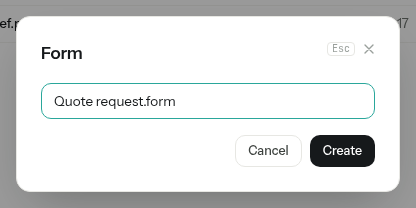
-
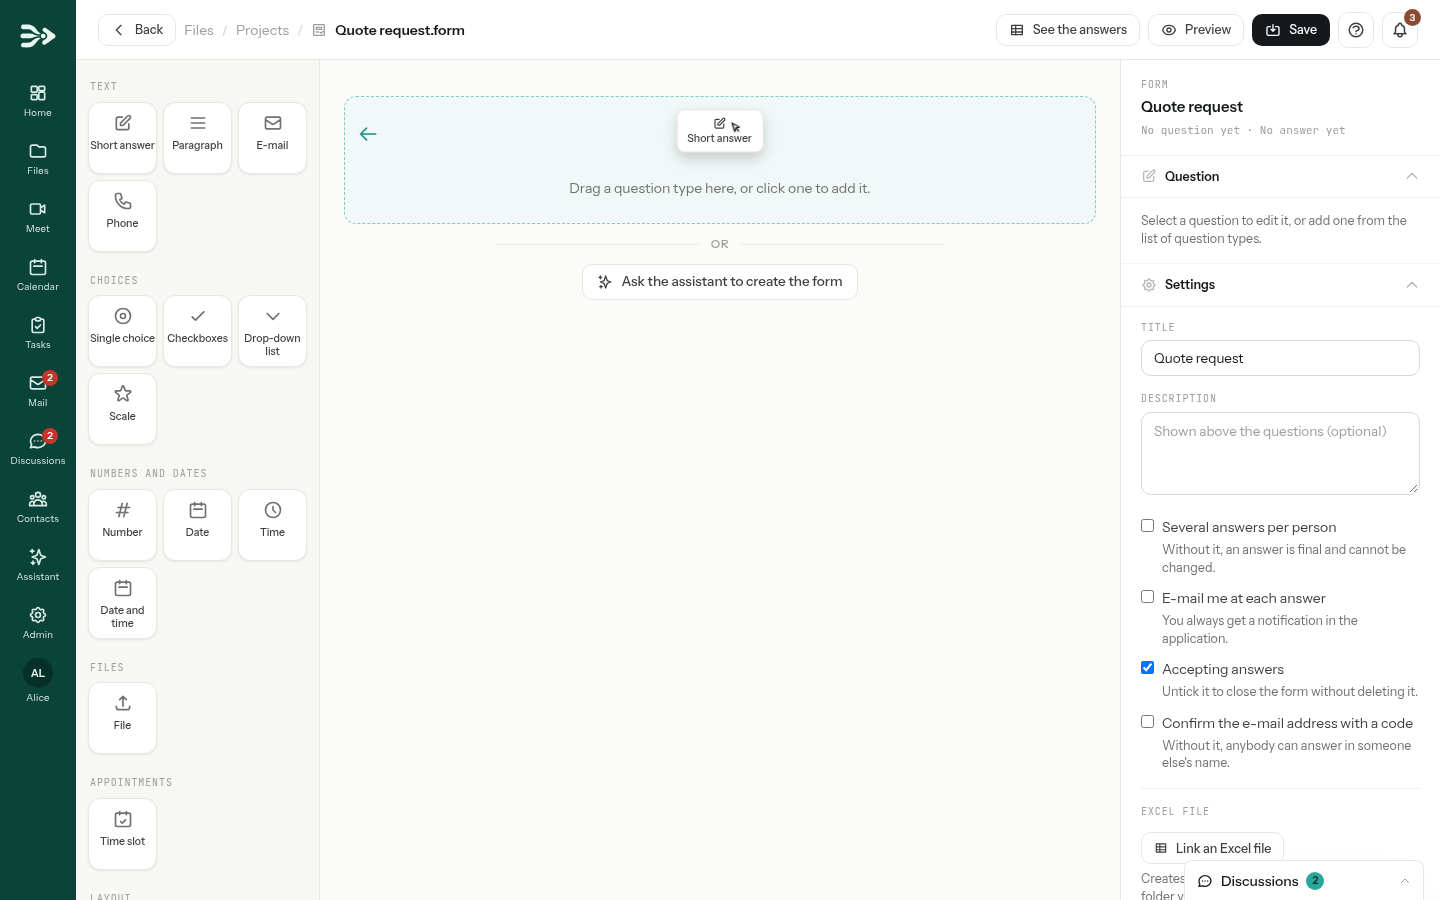
The editor opens on the empty form: the question types on the left, the form in the middle, and on the right the side panel with its Question and Settings sections.
Step 2 — Or let the assistant draft it
While the form has no question at all, the editor offers to have the assistant write a first version, under the empty form.
-
Click Ask the assistant to create the form and describe what you need under Describe the form you need, in your own words and language. In Chrome, Edge and Safari, the microphone button lets you dictate it. When your organisation offers several models, choose one in the list on the left.
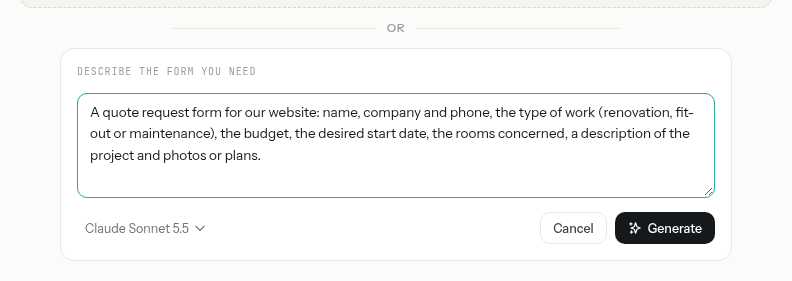
Click Generate, or press Ctrl+Enter (Cmd+Enter on a Mac). While the editor says The assistant is preparing your form…, wait: this can take a minute or two.
The draft appears in the editor with the notice Form generated by the assistant: review it, then save. Nothing is saved yet: change what you like, then save as in step 6.
What the assistant writes. The questions, in the language of your description, grouped in sections, at most 60 of them. It never adds an appointment slot: add that question yourself. If you have not changed the title yet, the draft's title replaces the one taken from the file name, and its description fills an empty one. The button only appears when an administrator has switched the assistant on, with an AI model.
Step 3 — Add your questions
Click a question type on the left to add it at the end of the form, or drag it exactly where you want it. The new question is selected, and the Question box of the side panel waits for you to type it.
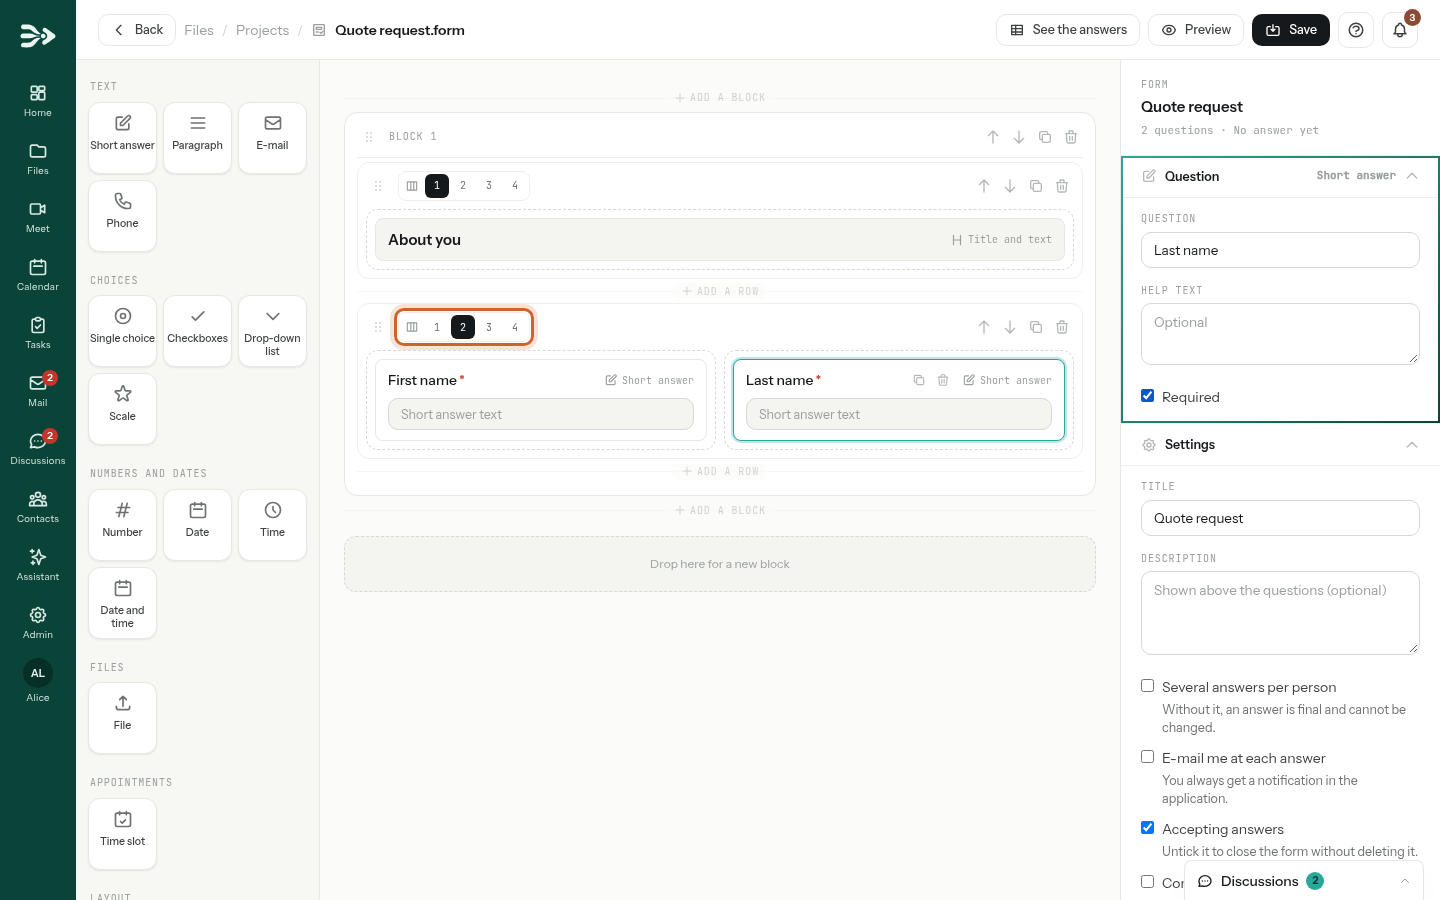
Blocks, rows and columns
- A block is a group of rows: a card in the editor, a section of the page your respondents see. Start a block with a Title and text to give the section a heading.
- A row holds 1 to 4 columns side by side: click 1, 2, 3 or 4 at the top left of the row. Respondents see the columns side by side on a computer and one below the other on a phone. Going back to fewer columns moves their questions into the last column kept: nothing is lost.
- Add a row, under each row, and Add a block, between blocks, open the list of question types and put the one you pick right there. You can also drop a question type on them, or on Drop here for a new block at the bottom.
- Each block and each row has its own bar: drag its grip or use its arrows to move it, the copy button duplicates it, the bin removes it, asking first when it holds questions. Each question has Duplicate and Delete the question buttons, and can be dragged to another column, row or block.
The question types
| Type | What respondents fill in |
|---|---|
| Short answer | One line of text: a name, a city, a reference. |
| Paragraph | Several lines of text. |
| An e-mail address, checked. | |
| Phone | A phone number: they pick the country in a list with flags and dialling codes, and the number must be valid. |
| Single choice | One of your choices, all shown at once. |
| Checkboxes | Any number of your choices. A single choice makes a box to tick, such as “I accept the terms”. |
| Drop-down list | One of your choices, in a list: handy for long lists. |
| Scale | A rating, from 1 to 5 for example, with a label at each end if you wish. |
| Number | A number, between a minimum and a maximum if you set them. |
| Date, Time, Date and time | Picked with their browser's own calendar or clock. |
| File | One or more files to upload, see below. |
| Time slot | A free slot of one of your booking pages, see below. |
| Title and text | Nothing to answer: a section title and an explanatory text. |
Step 4 — Set up each question
Click a question on the form: its settings open in the Question section of the side panel.
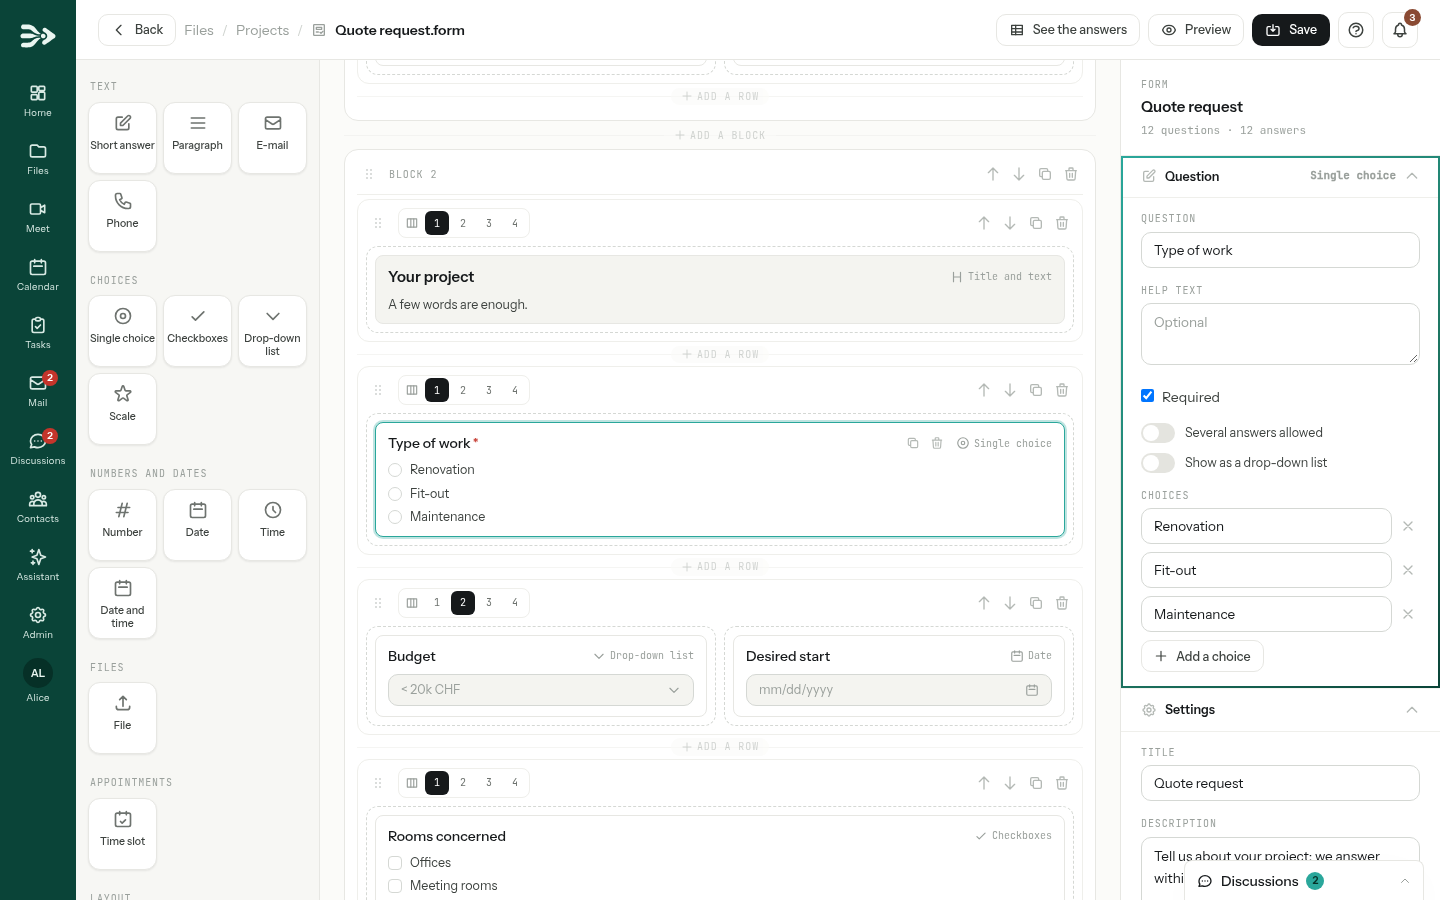
- Question: what you ask. Help text: an explanation shown under the answer field, optional.
- Required: the form cannot be sent without an answer to this question. A red star marks it.
- Choices (Single choice, Checkboxes, Drop-down list): type them under Choices. Add a choice, or Enter in a choice, adds the next one; the cross removes one. The switches Several answers allowed and Show as a drop-down list turn one kind into another, keeping the choices.
- Number: an optional Minimum and Maximum.
- Scale: From and To, whole numbers from 0 to 10, and the optional Low end label and High end label, such as “Not at all” and “Very much”.
- Title and text: its Title and Text.
A file to upload
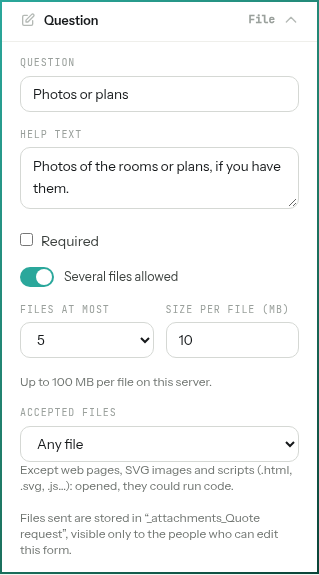
- Several files allowed, then Files at most: from 2 to 10 files. Without it, one file.
- Size per file (MB): up to the maximum of your server, written underneath.
- Accepted files: Any file, Images, PDF, Documents (PDF, Office, text), or Other extensions… to list your own, such as
pdf, docx, zip. Web pages, SVG images and scripts are refused whatever you choose: opened, they could run code. - Where the files go: into a folder next to the form, named after it, here
_attachments_Quote request, with a folder per respondent (their e-mail address) and per question. Only the people who can edit the form see that folder: a colleague who may only read the folder, a workspace guest or a visitor of a link never does. In your own Files, the files count against your storage space.
An appointment slot
A Time slot question lets the respondent book a meeting with you as part of their answer, here a discovery call.
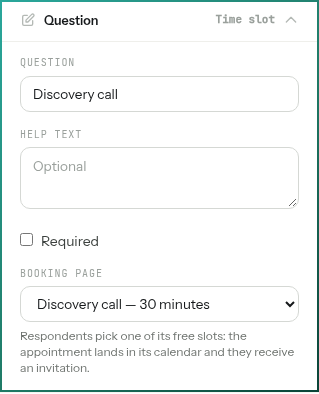
- Under Booking page, choose one of your own booking pages. None yet? Create one in the calendar opens the calendar, where you set its hours and duration.
- Respondents pick one of its free slots: the appointment lands in the calendar of the booking page, and they receive an invitation. A slot is booked only when the answer is sent: if someone took it in between, the respondent is asked to pick another one.
- A form holds one time slot question at most. The editor warns you when its booking page is turned off or its period is over: it then offers no slot.
Step 5 — Choose the form's settings
The Settings section of the side panel holds what applies to the whole form.
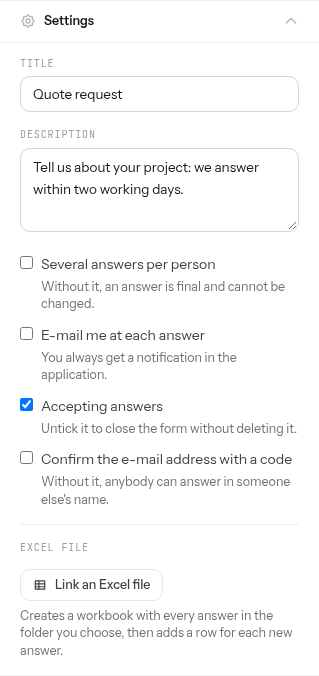
| Setting | What it does |
|---|---|
| Title, Description | Shown above the questions. The title is required. |
| Several answers per person | Off (the default): one answer per person, final, which cannot be changed. On: the same person may send the form again. |
| E-mail me at each answer | An e-mail with every answer, see below. You get a notification in PAFworks either way. |
| Accepting answers | On by default. Untick it to close the form without deleting it: respondents see that it is closed. Tick it again to reopen it. |
| Confirm the e-mail address with a code | Respondents of a public link type a code mailed to their address before they answer. Without it, anybody can answer in someone else's name. |
| Excel file | A workbook fed with every answer, see below. |
Step 6 — Save and preview
-
Click Save at the top right, or press Ctrl+S (Cmd+S on a Mac). The editor never saves on its own, and asks before you leave with changes not saved. A save stops on the first incomplete question and shows it: a question without a title, a choice question without choices, the same choice twice…
-
At the first save, unless the form already has a link or sits in a workspace, a bubble points to the Sharing section: For now, only the employees who can open this folder can answer. To open the form to anyone else, you need a public link: see step 7.
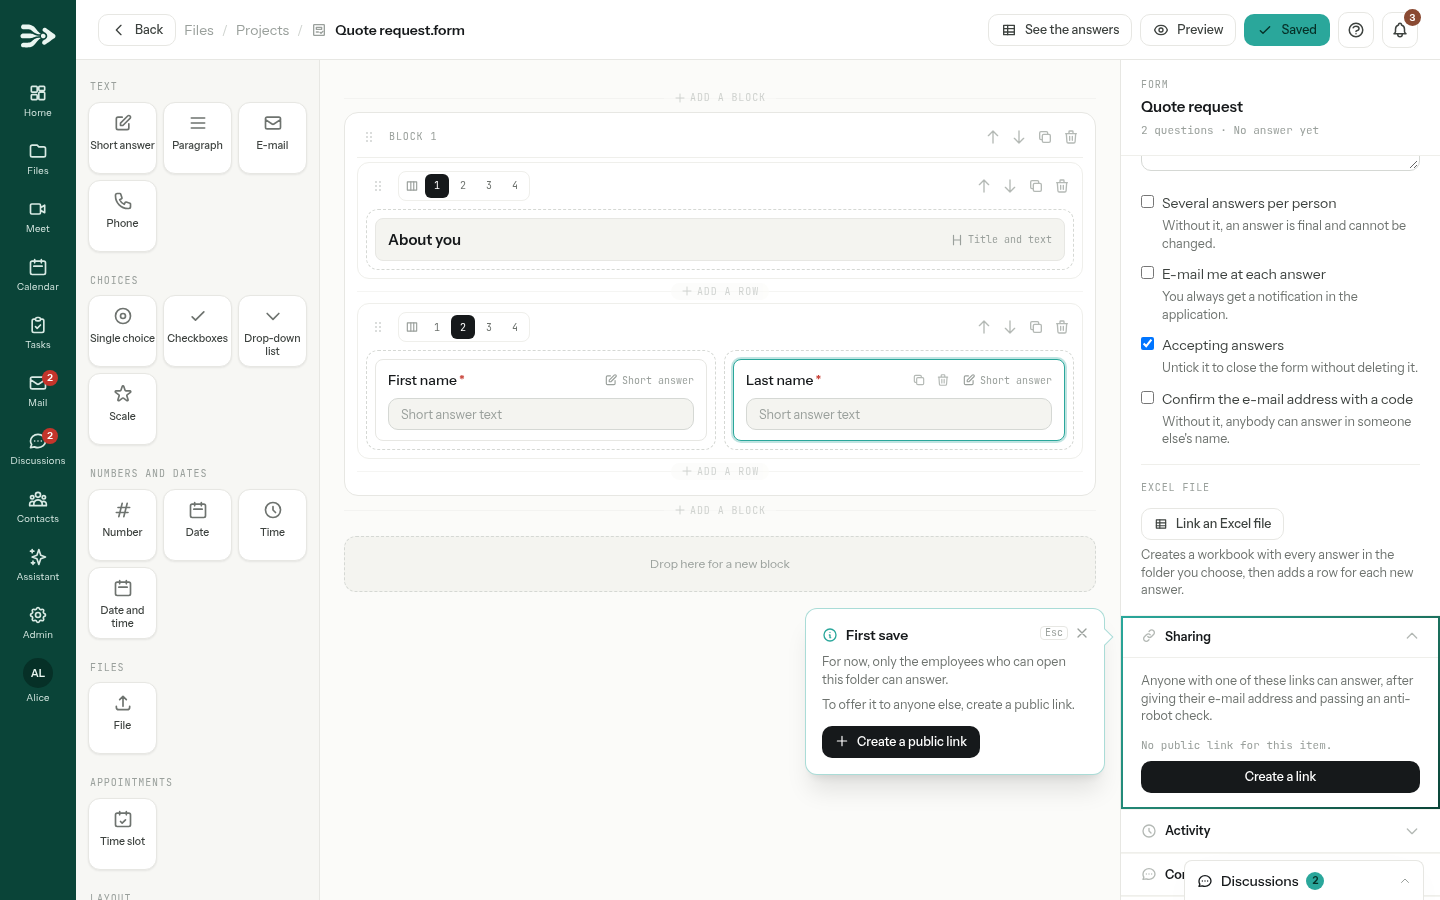
-
Click Preview, at the top: the form opens in a new tab as your respondents will see it, under Preview — answers are not recorded. Its Send button is off.
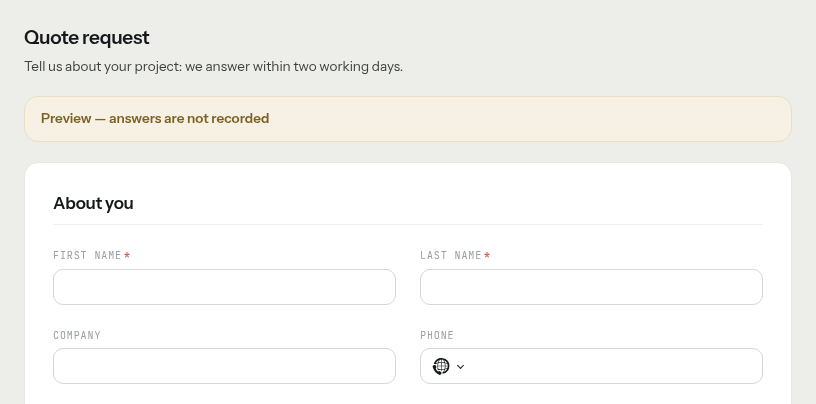
Every save is a version. The Versions section of the side panel lists them: restoring one brings back its questions and settings, and the answers stay. If a colleague saved the form while you were editing it, the editor says so and lets you Reload or Overwrite.
Step 7 — Publish it with a link
In the side panel, open Sharing and click Create a link, or Create a public link in the first-save bubble. The link is made and copied: you can paste it into an e-mail, a newsletter or a page of your site.
-
To name a link, protect it with a password or give it an end date, click Advanced options…. In Share via link, fill in Label (optional), here
Website, and if you wish Password (optional) and Expires on (optional), then click Create link.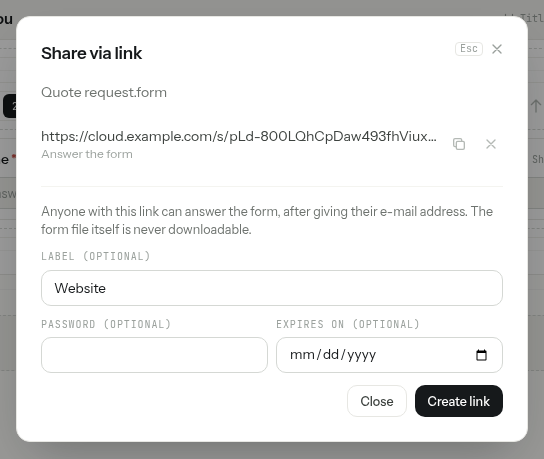
-
Each link of the form is listed under Sharing with Copy, whether it is Password protected, its Expiry, Send by e-mail, Embed and Delete the link.
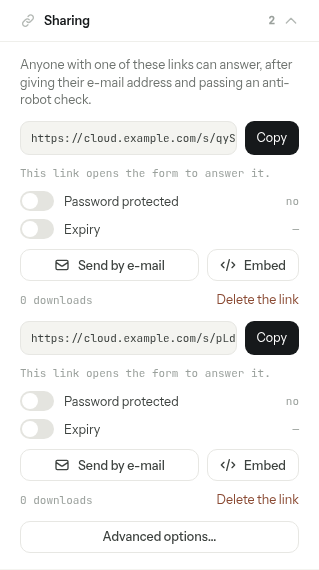
One link per place. Give a link to each place where you publish the form, such as Website and Newsletter: every answer records the label of the link it came through, and the answers can be filtered by it.
A link opens the form to answer it, and nothing else: the .form file itself can never be downloaded. A link with an expiry date works until the end of that day. Deleting a link stops it at once; the answers that came through it stay.
Step 8 — Embed it in your website
-
Under the link, here
Website, click Embed. Embed the form in a site shows the Code to paste: click Copy and paste it into a page of your site, where the form should appear.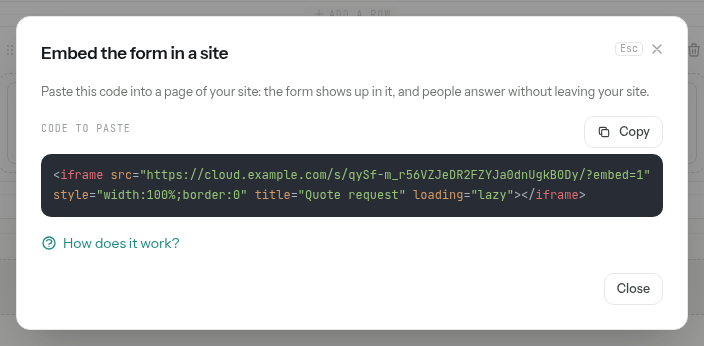
The form takes the whole width of its place on your page. How does it work? gives the script that sets its height automatically, the events the form tells your page (a step shown, an answer recorded, a sending refused) and ready-made recipes, such as Go to a thank-you page after an answer. Send these to whoever builds your site.
What your site never gets. The answers and the respondent's address are never sent to your page, only the events. The anti-robot check and the e-mail code stay inside the frame. A link with a password cannot be embedded: it has no Embed button.
What respondents see
-
The link, or your page, shows the title, the description and the questions, under the name and logo of your organisation's theme, if an administrator set one. No account is needed: the respondent starts with Your e-mail address. A colleague signed in to PAFworks who can open the form's folder answers as themselves through the link, without typing an address.
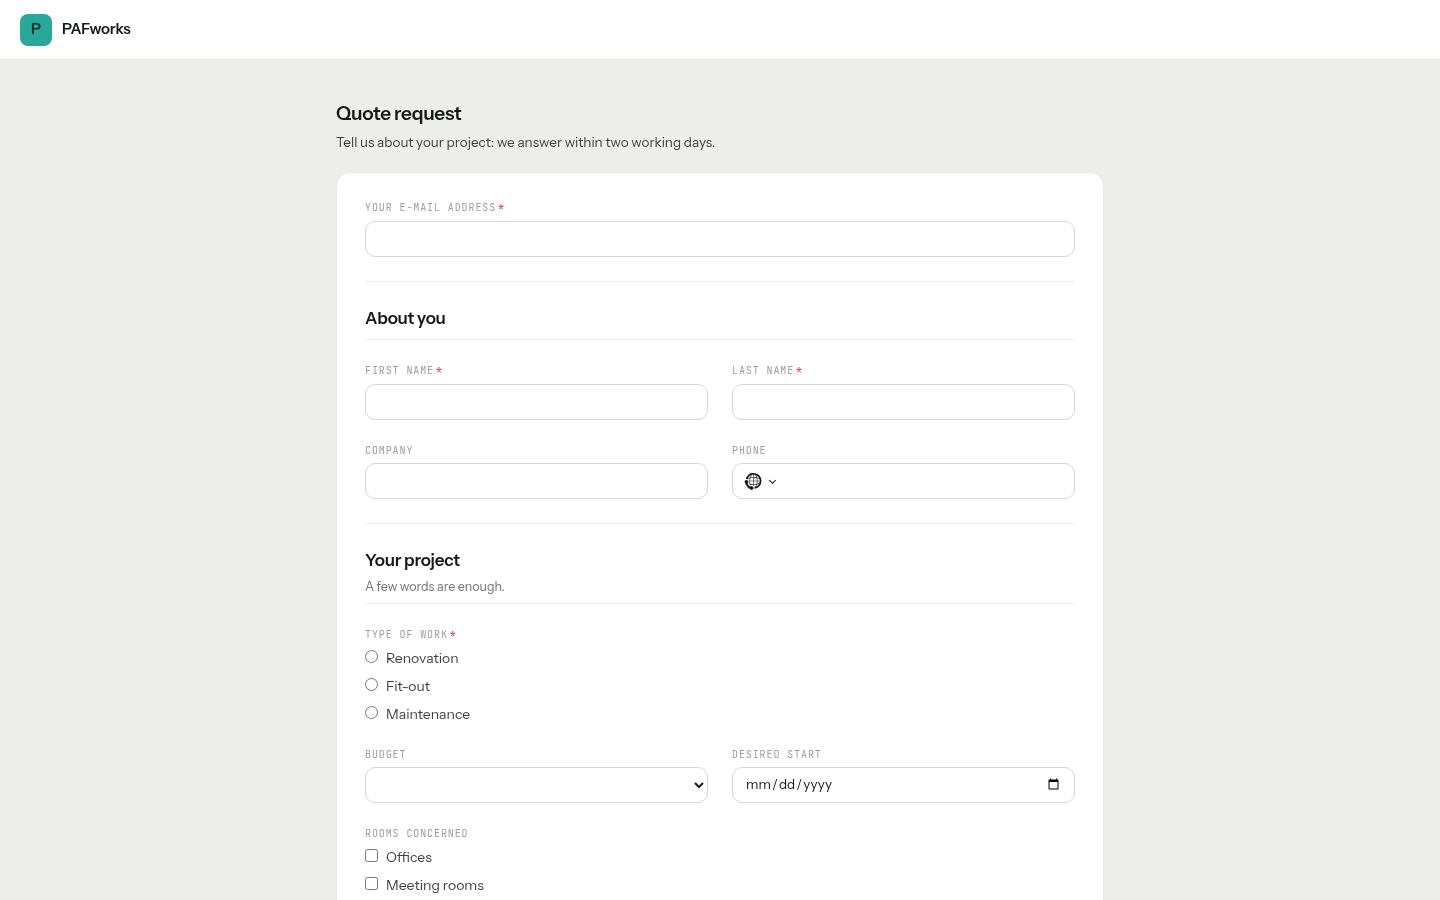
-
They answer the questions. A time slot question shows the next three days with free slots, with Previous, Next and Show more slots, and No appointment when it is optional. Meanwhile, a check that they are not a robot runs by itself: once it says Checked: you can send., they click Send.
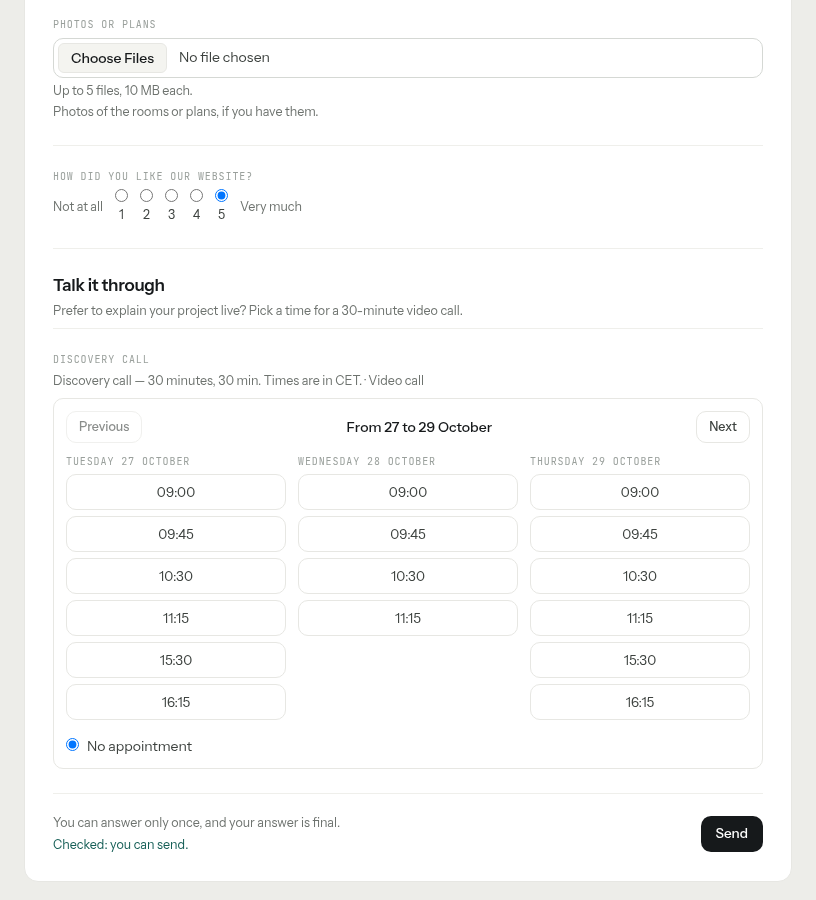
-
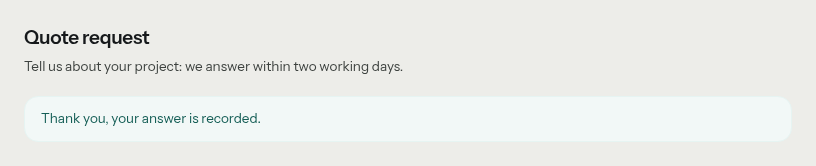
They read Thank you, your answer is recorded. When the form takes several answers per person, a Send another answer link follows.
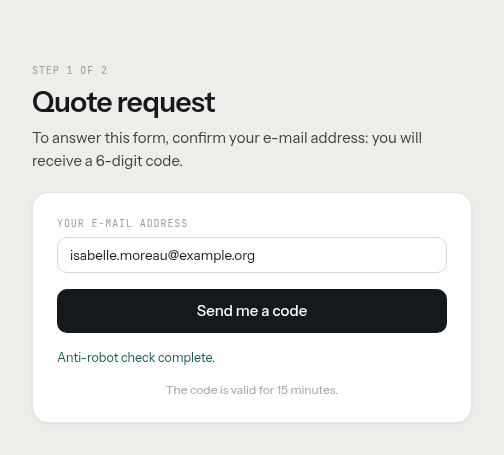
With Confirm the e-mail address with a code, the questions come after two short steps. Step 1 of 2: the respondent types their address and clicks Send me a code. Step 2 of 2: they type the 6-digit code received by e-mail and click Confirm. The form then shows Answering as their address, with Use another address.
- A link with a password first asks for it: the respondent types it and clicks Unlock.
- A form that takes one answer per person says so next to Send: You can answer only once, and your answer is final. A second answer from the same address or account is refused.
- A closed form shows This form is closed.
Read the answers
In Files, click the form: it opens on its answers, and Edit leads to the editor. From the editor, See the answers leads back.
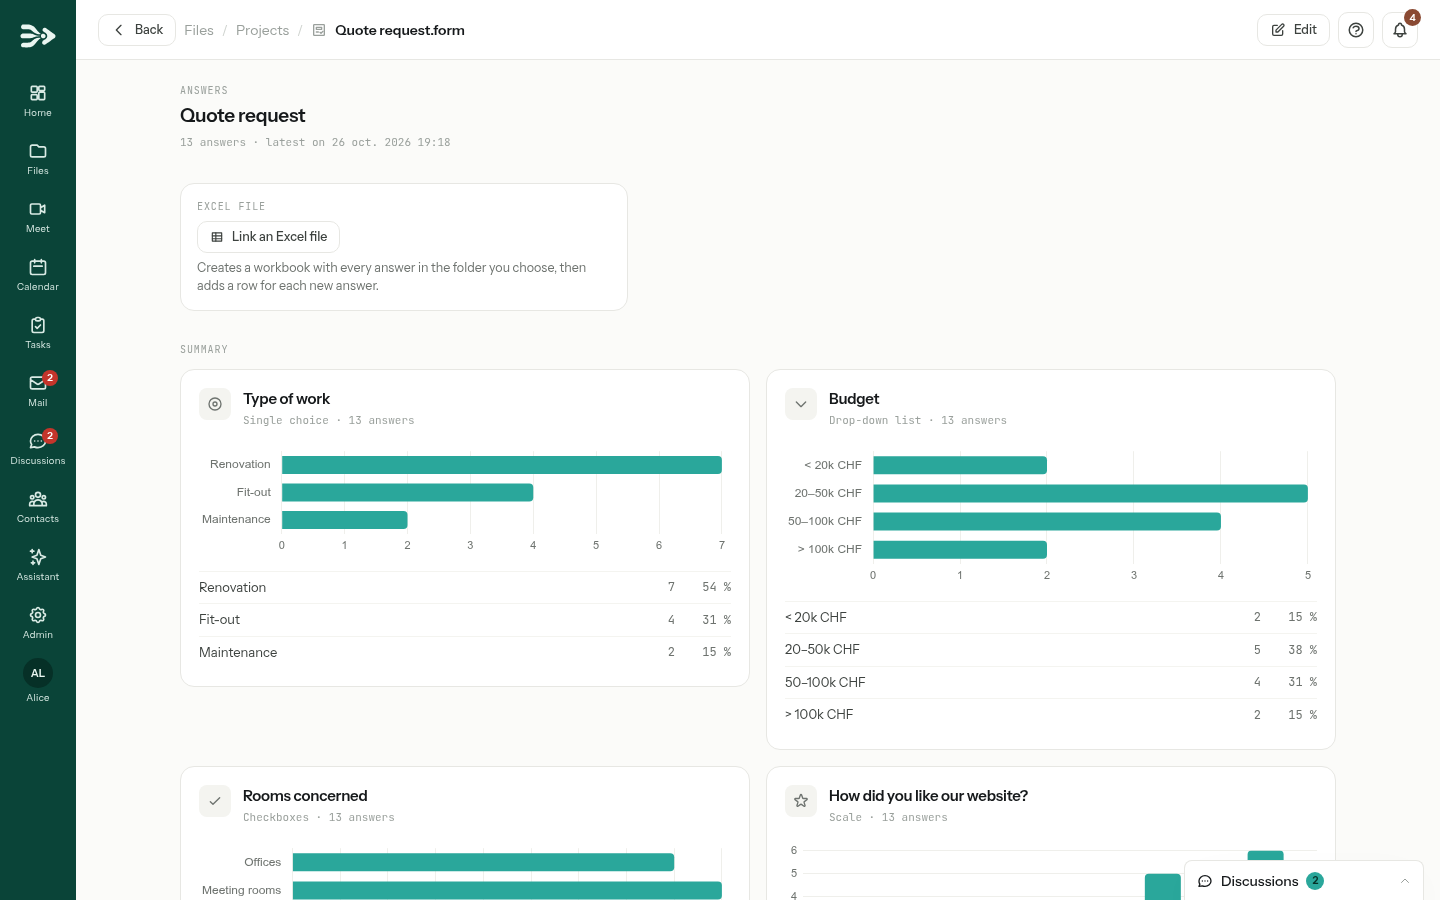
- The summary gives a chart per question whose answers add up: the choices, with their counts and shares; a scale, with its average; a number, with its average, minimum and maximum; a time slot, with the appointments booked and those to come. Text and files are in the table.
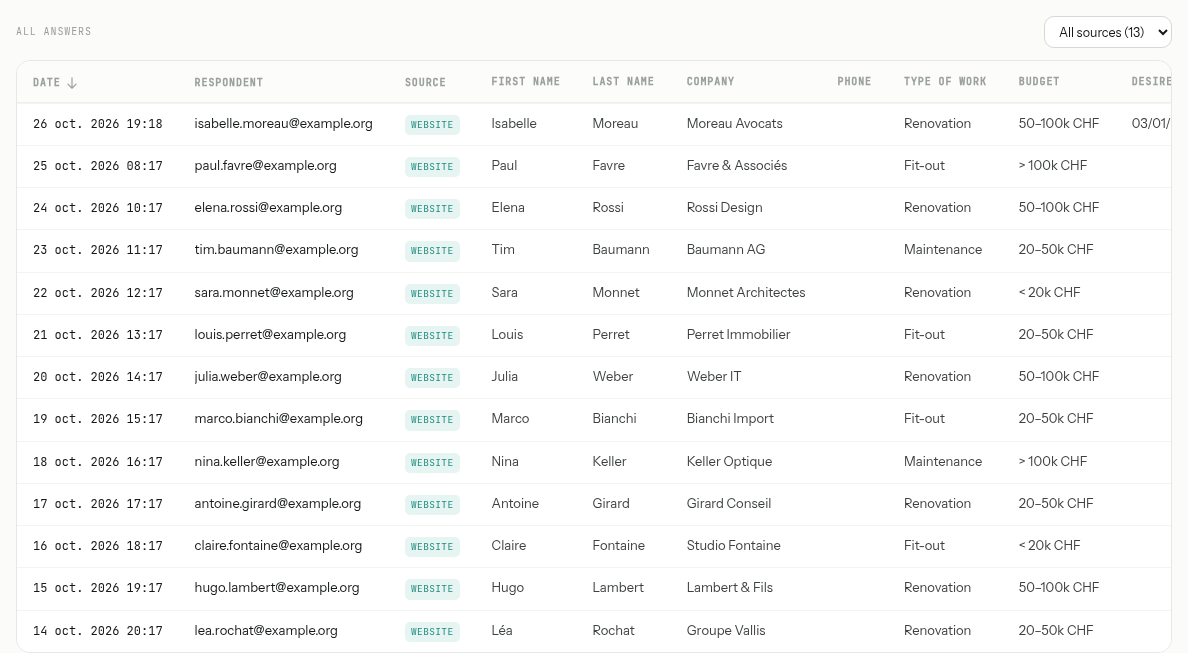
- All answers: one row per answer, one column per question. Click Date to put the oldest or the newest first. The list on the right keeps the answers of one source: a link, by its label, Folder for your colleagues, Workspace guest. The table shows 50 answers per page.
Click a row: Answer details shows the whole answer in the order of the form. Files sent with it can be opened and downloaded from there.
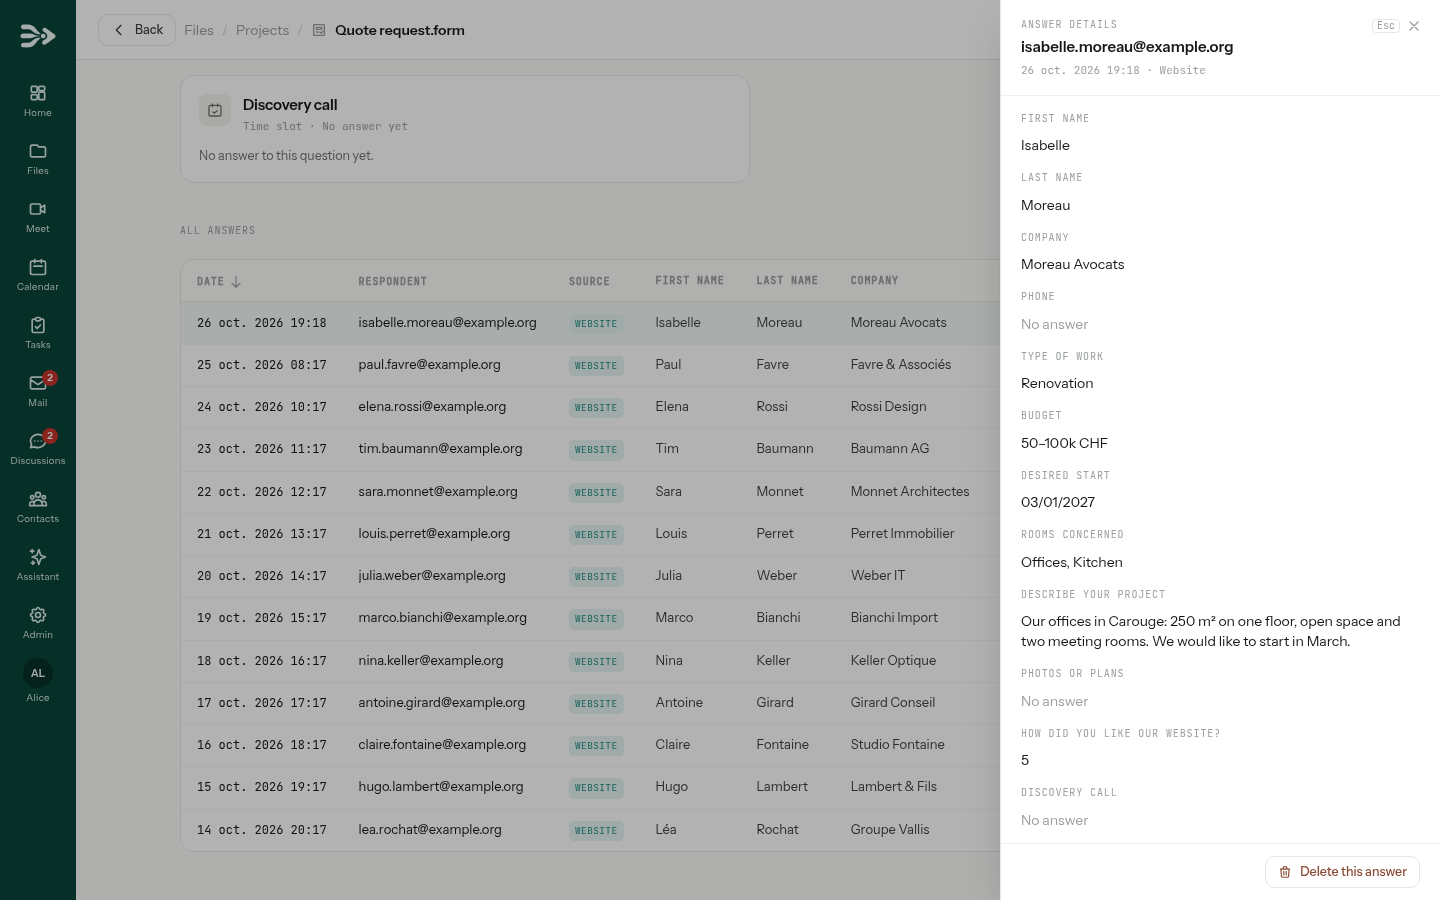
Delete this answer asks first, then deletes it for good. The files sent with it go to the trash, and its row stays in the Excel workbook. If the answer booked an appointment, a box offers to cancel it too, and the respondent is told.
An Excel workbook kept up to date
On the answers page, or in the form's Settings, click Link an Excel file.
-
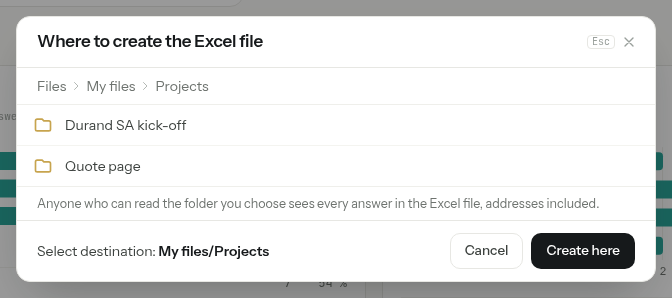
In Where to create the Excel file, pick a folder, the form's own by default, and click Create here.
-
The workbook, here
Quote request.xlsx, holds every answer so far: the date, the respondent, the source, then a column per question. Each new answer adds a row, a moment after it is sent. The section says Up to date, or how many rows are waiting and why.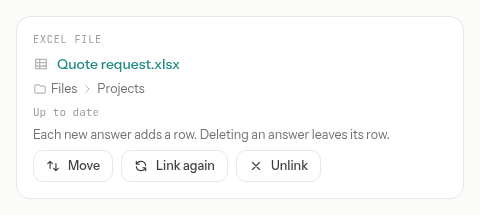
- The workbook is yours: sort it, add columns or sheets, nothing is undone. New rows go after the last row of the first sheet, and a question added or renamed since gets a new column on the right.
- Rows wait while the file is open in the editor or locked, or while the storage space is full, and are written as soon as possible.
- Deleting an answer leaves its row. Unlink stops the new rows and leaves the file where it is; Link again creates a new workbook with every answer; Move puts it in another folder, where it keeps receiving the new rows.
Mind who can read the folder. Anyone who can read the folder you choose sees every answer in the workbook, e-mail addresses included.
Be told of new answers
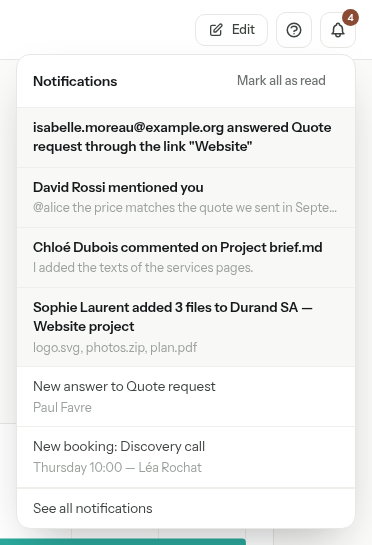
Each answer rings the bell at the top right, with who answered and through which link. A click opens the answers. Several answers from the same person within ten minutes ring once, as long as you have not read the first notification.
- Like every notification, it also reaches you by e-mail when Send my notifications by e-mail too is ticked in your preferences, and on the devices where you turned notifications on.
- With E-mail me at each answer, in the form's settings, you get an e-mail with every answer of the respondent and a link to all the answers. Replying to it writes to the respondent.
- Only the person who created the form is notified. Colleagues who can edit the form read the answers on its answers page.
From Claude or the assistant
Connected to PAFworks, Claude can create a form from your description, change it, and read and sum up its answers. It can list and delete the form's public links, but never creates one: you make the link in the editor. See Use PAFworks from Claude and other AI apps. The assistant of PAFworks can do the same, and creates a link once you approve it: see Work with the AI assistant.
Good to know
- Who can answer without a link: anyone who can open the form's folder. In a team share where a colleague may only read, the form shows at the top of the folder as a card with an Answer button. In a workspace, guests answer from the form's card, even guests who may only read: the editor then warns that the form will still let them add files to the folder.
- Who can change the form and read the answers: anyone who can write in its folder.
- A form holds up to 100 rows and 200 questions, 4 columns per row, 100 choices per question, 10 files per file question and one time slot question.
- Answers are stored by question: rewording a question keeps its answers. The answers of a question you delete stay readable at the end of the table, under Deleted question.
- The code of Confirm the e-mail address with a code has 6 digits and is valid for 15 minutes, once, in the browser that asked for it; after 5 wrong tries, a new one is needed. Resend the code works after a minute. A confirmed address stays confirmed for 4 hours in that browser.
- Without the code, the address typed is not checked: someone could answer under another person's address, and, on a form that takes one answer per person, take that person's place.
- Through its public links, a form takes up to 20 answers an hour from the same connection, and 500 an hour in all.
- The form has no closing date of its own: give its link an expiry date, or untick Accepting answers.
- The thank-you message is the same for every form. On your own site, the Embed help gives the code to send respondents to a thank-you page of yours.
- A copy of a
.formfile holds the questions and settings only: no answers, no links, no files. - A form sent to the trash takes the folder of its files along, and its links stop answering. Restored, it comes back whole, answers included.
- Accounts that may not download files cannot create public links, so they cannot publish a form by link.