 PAFworks
Get a PDF signed
Send a PDF to the people who have to sign it. They need no account: they confirm their e-mail address with a code, sign in their browser, and everybody receives the document sealed with your organisation's certificate, with an audit trail of every step.
What you need
- The PDF in your files, up to 30 MB and not protected by a password.
- The name and e-mail address of each signer: up to 20 people.
- An account allowed to download files. Accounts with the User (no download) role cannot send documents out, so they cannot ask for signatures.
Step 1 — Start a request
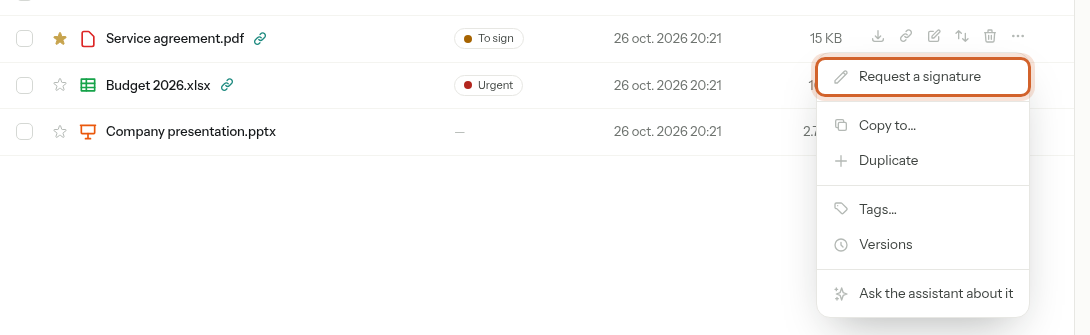
In Files, open the More actions menu (…) of the PDF and choose Request a signature. The Request a signature button at the top of the PDF viewer does the same. A draft opens in the request editor.
Step 2 — Add the signers
The editor shows the settings on the left and the document on the right. Check the Title: the signers see it in the e-mail and on their page. Then click + Add a signer for each person and fill in Name, E-mail address and, if you like, Role (optional).
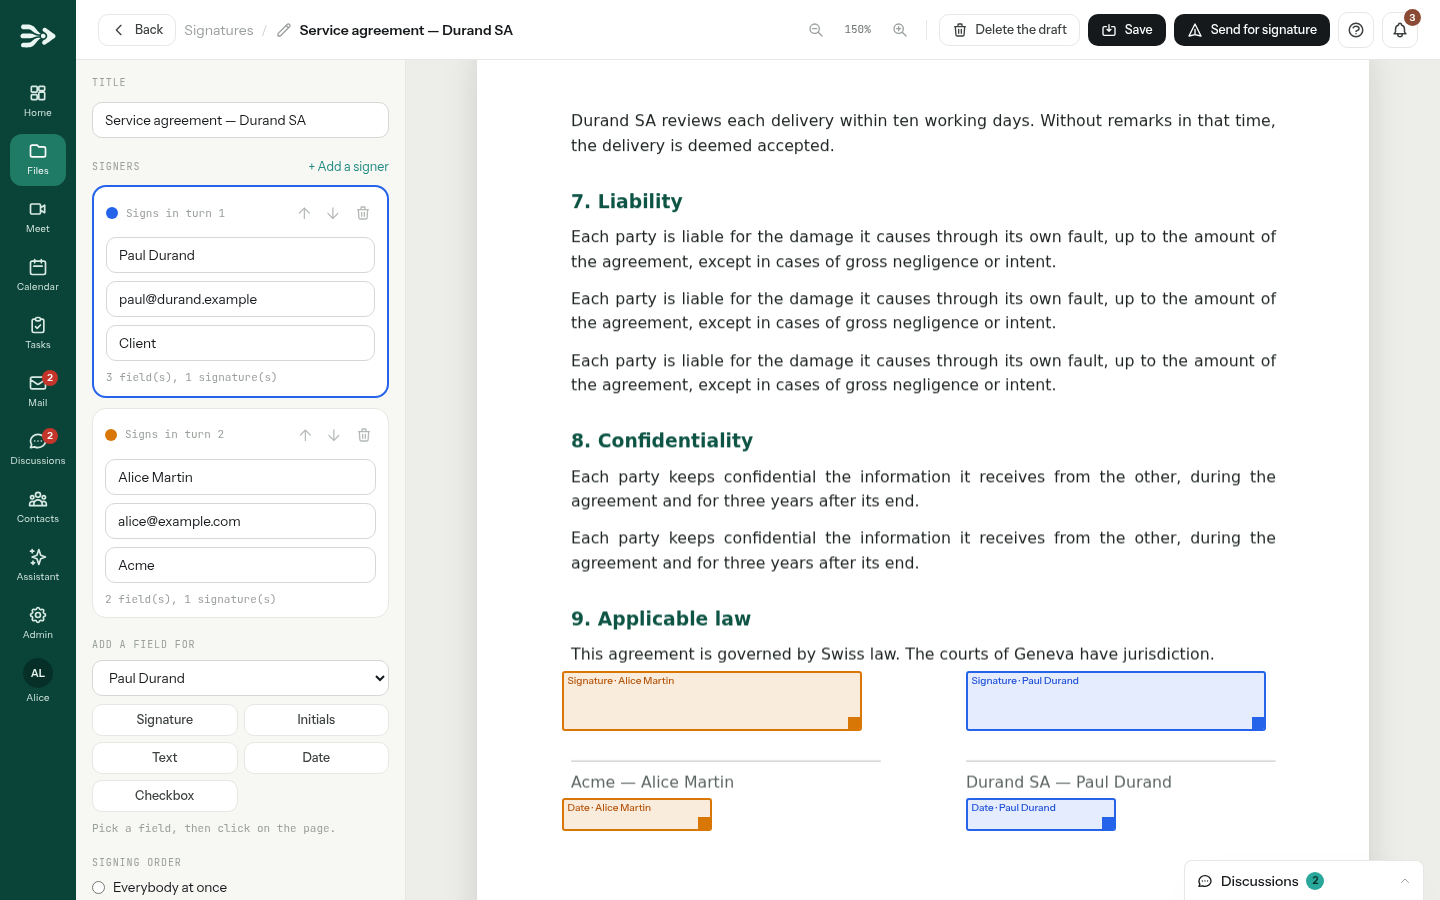
- Each signer gets a colour, which their fields take on the document.
- ↑ and ↓ change the order of the signers; the bin (Remove this signer) removes a signer and their fields.
- Anyone with an e-mail address can sign, inside or outside your organisation. A colleague who has a PAFworks account signs the same way, from the link in the e-mail.
Step 3 — Place the fields
Under Add a field for, choose the signer.
Click the kind of field, then click on the page where it goes.
Drag the field to move it; drag the coloured square in its corner to resize it.
| Field | What the signer does |
|---|---|
| Signature | Draws or types their signature. |
| Initials | Draws or types their initials. |
| Text | Types a text, such as an address or a position. |
| Date | Nothing: it is filled in with the day they sign. |
| Checkbox | Ticks a box. |
Click a field to select it: you can then give it to another signer (Filled by), say what a text field asks for (What it asks for, shown in the empty field), make it optional by clearing Required, or remove it (Delete this field). Under each signer, a line counts their fields. Every signer needs at least one Signature field.
Step 4 — Set the order, the deadline and the message
| Setting | What it does |
|---|---|
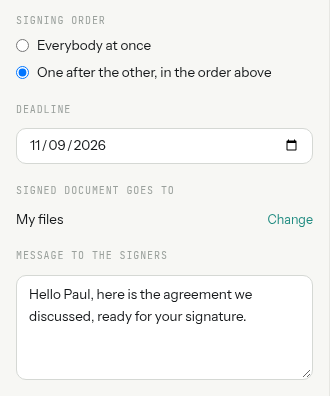
| Signing order | Everybody at once invites every signer when you send. One after the other, in the order above invites the first one, then each next signer once the previous one has signed. |
| Deadline | The last day the document can be signed. It is set 30 days after the draft was started; change it, or clear it for no deadline. |
| Signed document goes to | The folder of the signed document and its audit trail: the folder of the PDF unless you click Change. |
| Message to the signers | A note shown in the invitation e-mail and at the top of the signers' page. |
The draft saves itself as you go; Save saves at once. You can leave it and come back later from the list of requests, or throw it away with Delete the draft: the PDF itself stays where it is.
Step 5 — Send it
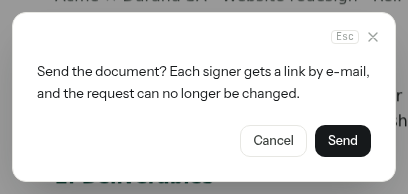
Click Send for signature, then Send. Each signer receives a link by e-mail — the first one only, in the one-after-the-other order — and the request can no longer be changed.
The PDF is copied as it is at that moment: the signers sign that copy, whatever happens to the file afterwards.
What the signers see
-
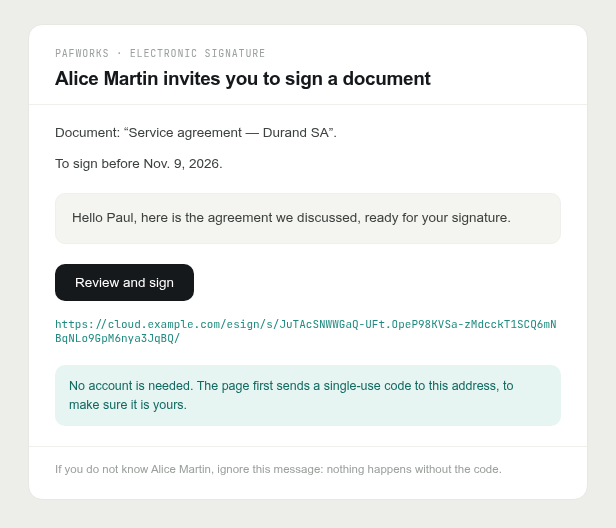
An e-mail titled Please sign “…”, with your message, the deadline and a Review and sign button. If the signer replies to it, the answer comes to you.
-
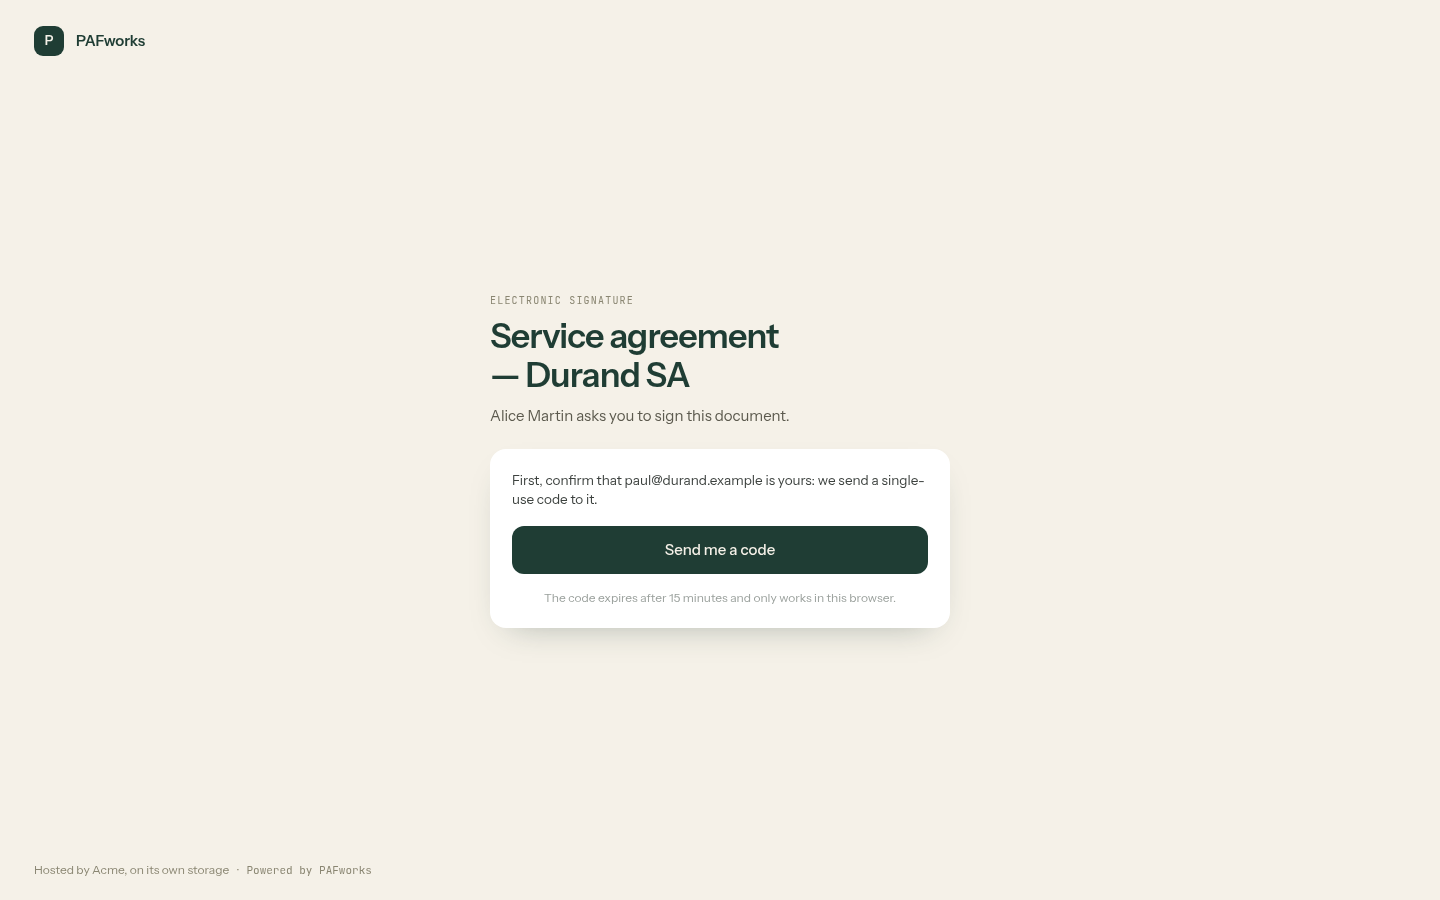
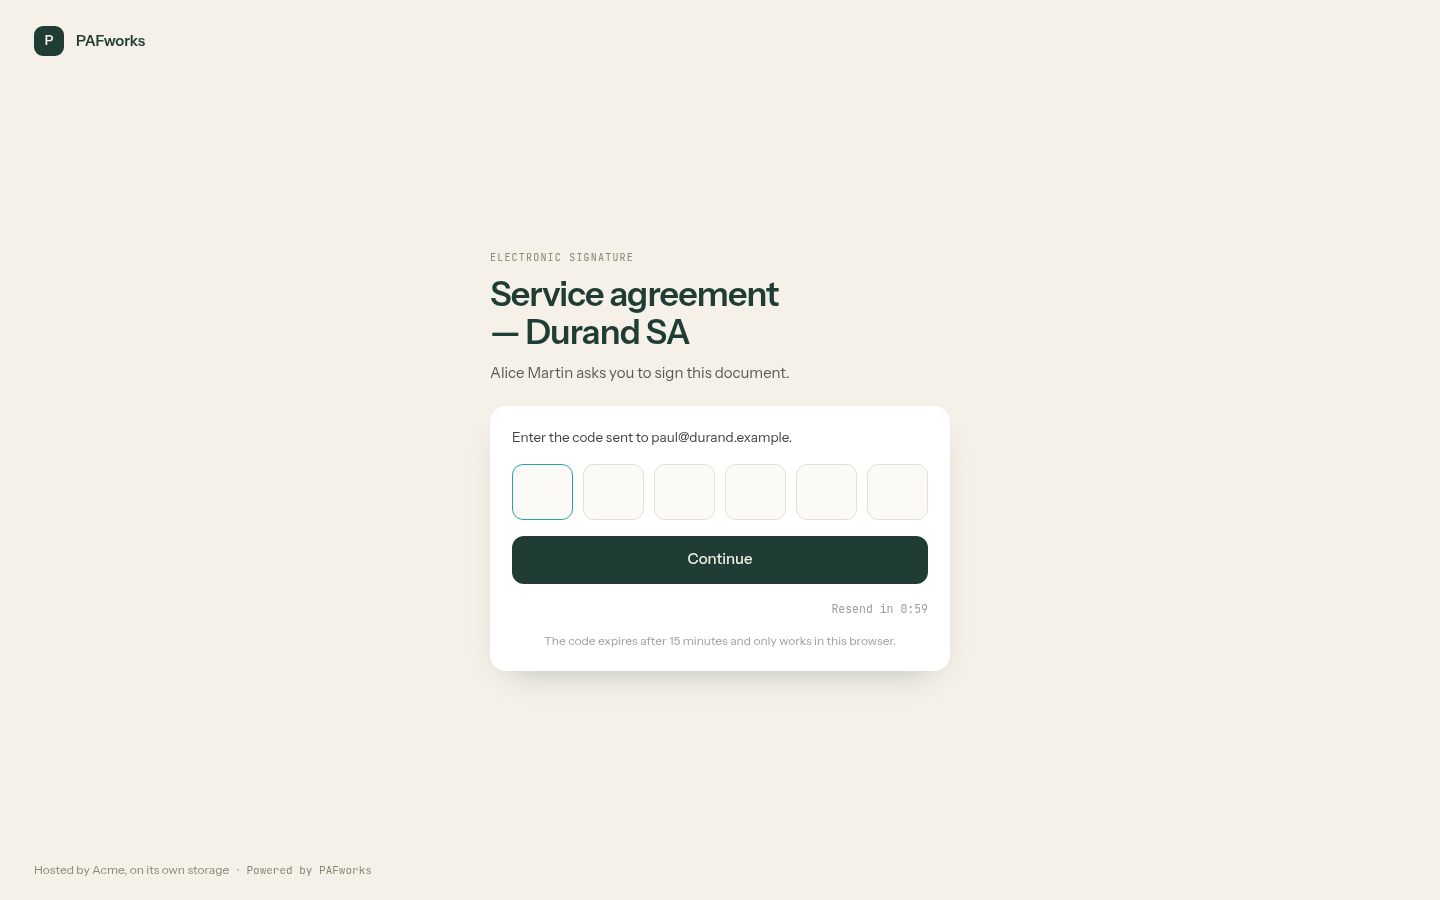
The link opens a page that first checks the address: the signer clicks Send me a code, then types the 6-digit code received by e-mail. No account, no password.
-
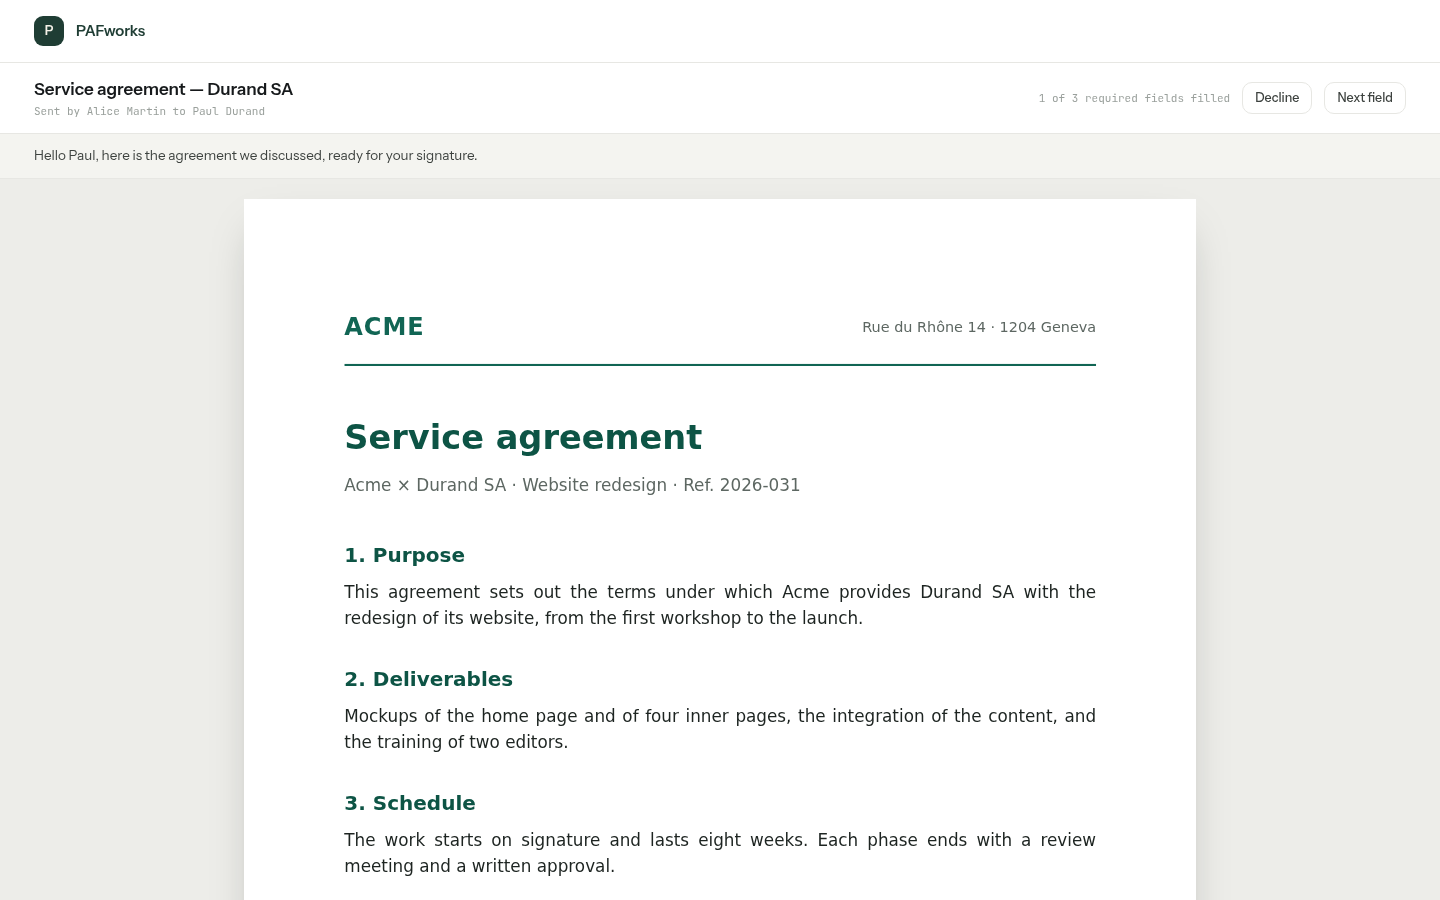
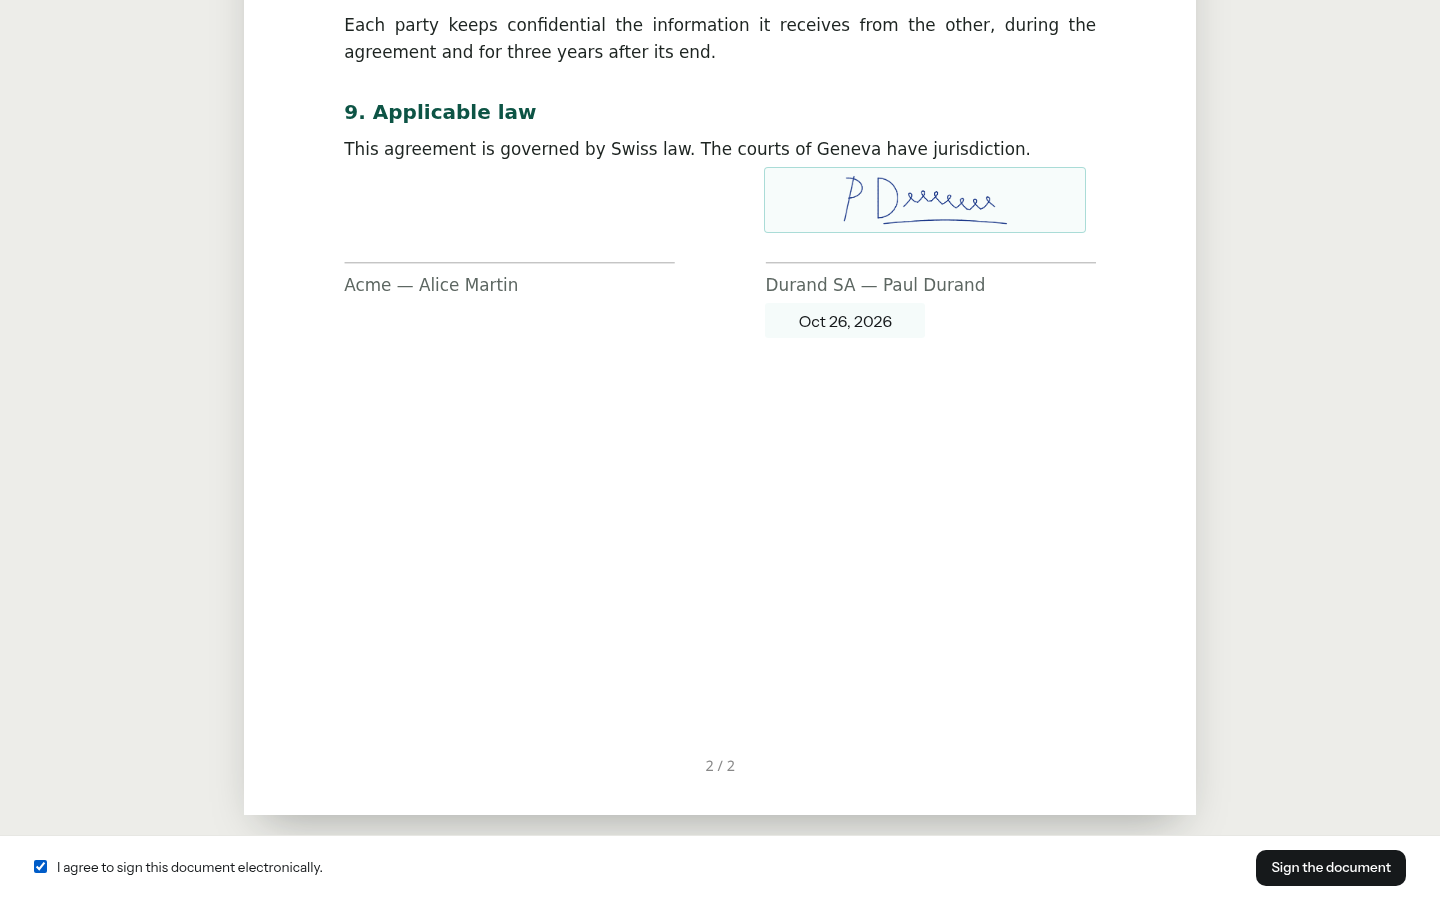
The document opens with the signer's own fields highlighted. Next field jumps to the next one still empty, and the top of the page counts the required fields filled.
-
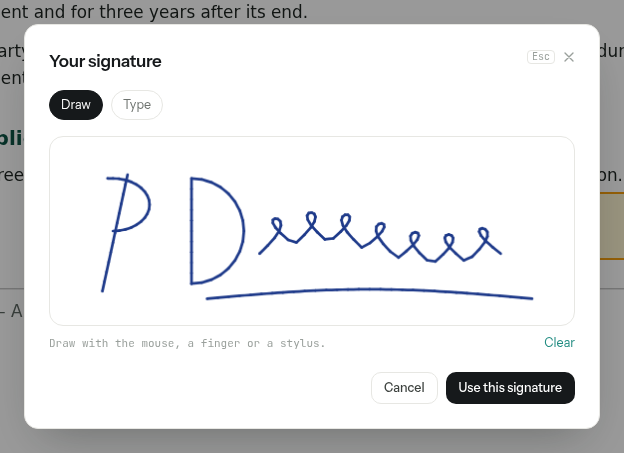
A click on Sign (or Initial) opens a window: Draw the signature with the mouse, a finger or a stylus, or Type the name, which is written in a handwriting font. Use this signature places it. A click on the next signature field puts the same signature there.
-
At the bottom of the page, the signer ticks I agree to sign this document electronically. and clicks Sign the document. The button works once every required field is filled and the box is ticked.
-
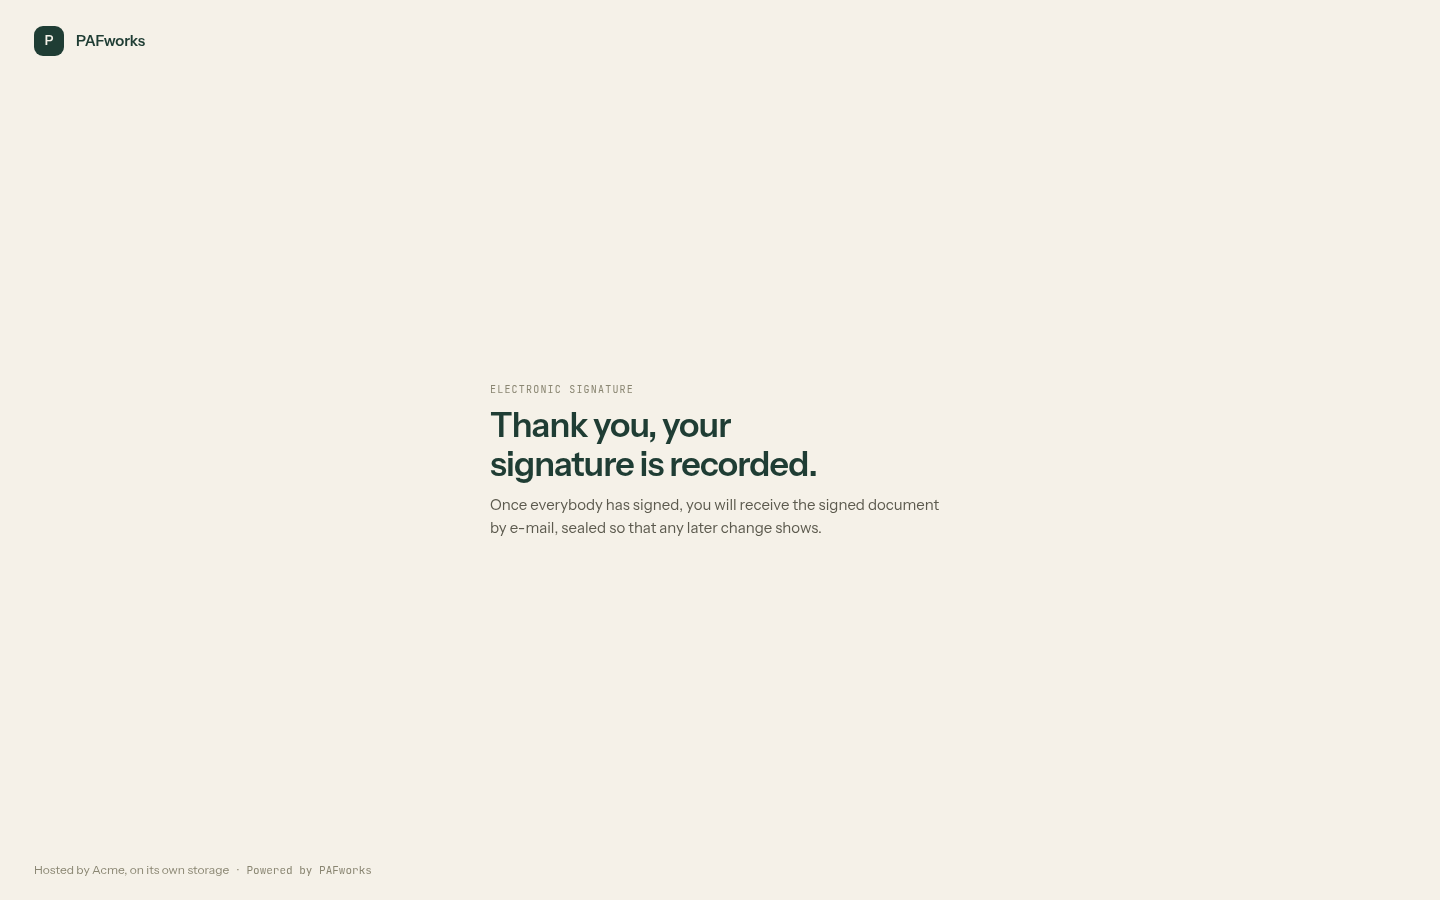
The page confirms the signature. Once everybody has signed, each signer receives the signed document by e-mail.
A signer who does not agree clicks Decline and gives a Reason. The request then closes: you are told why, in the bell and by e-mail, and the other signers already invited are told that the document will not be signed.
Follow your requests
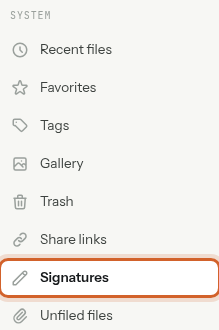
In Files, click Signatures in the sidebar. The list shows every request with its document, its state, how many signers have signed, and when it last changed. The buttons above it filter the list: All, Waiting, Signed, Drafts, Closed.
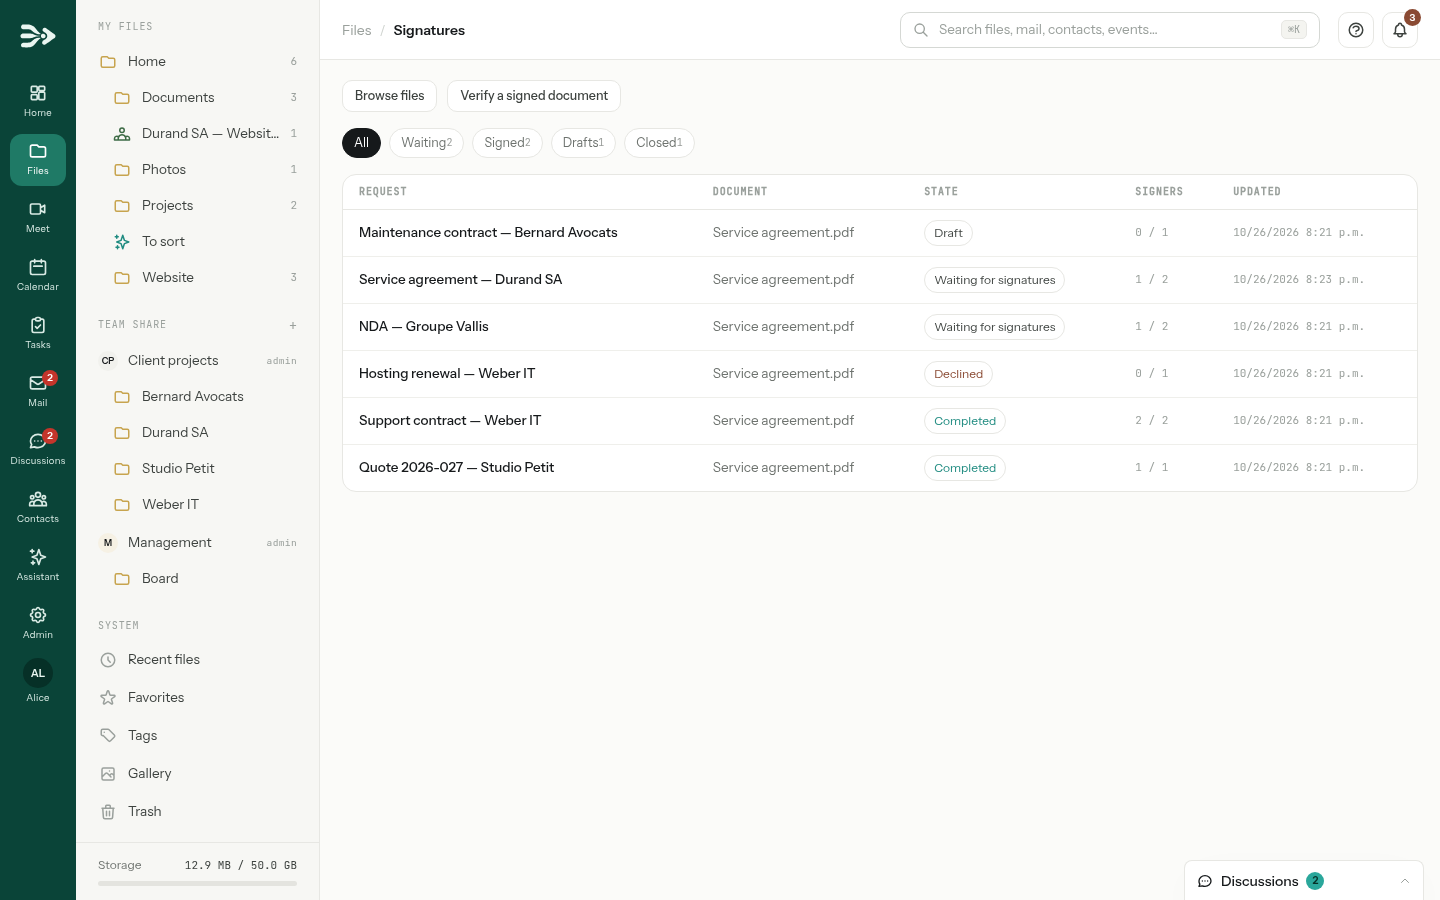
| State | Meaning |
|---|---|
| Draft | Not sent yet: click it to go back to the editor. |
| Waiting for signatures | Sent; at least one signer has not signed yet. |
| Being sealed | Everybody signed; the signed document is being made. |
| Completed | Signed by everybody and sealed. |
| Declined | A signer refused to sign. |
| Expired | The deadline passed before everybody signed. |
| Cancelled | You cancelled it. |
Click a request to see where it stands: each signer's state (Invited, Not invited yet while waiting for their turn, Signed), when they opened the document and when they signed, and the audit trail of every step, with the IP addresses.
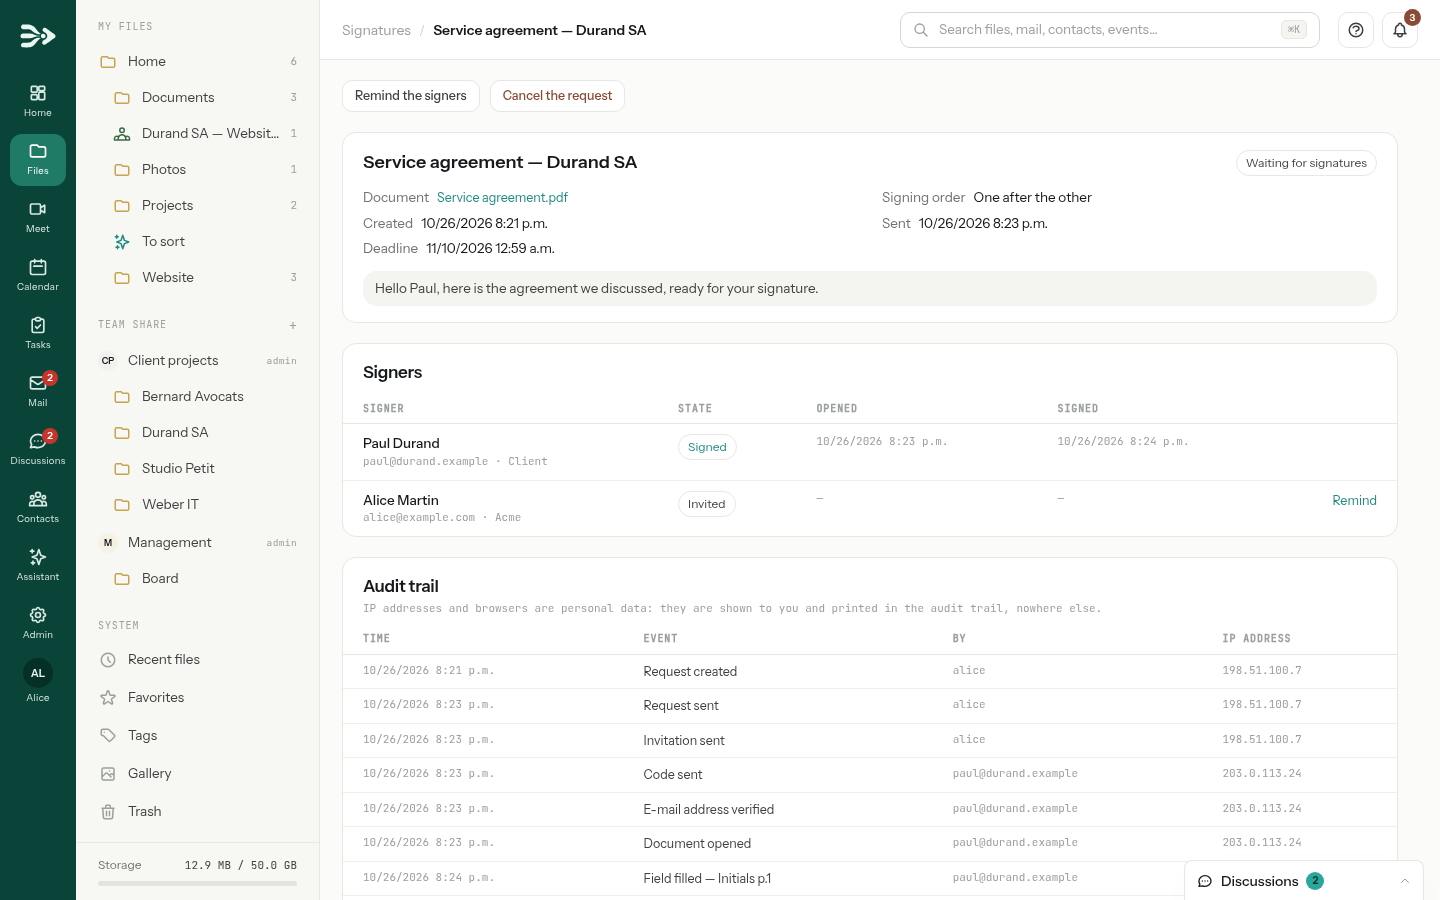
- Remind the signers e-mails a new link to every invited signer who has not signed; Remind, on a signer's row, to that person only. A signer reminded or invited less than ten minutes ago is skipped.
- Cancel the request stops it: the links sent stop working, and the signers who were invited are told.
- Delete, once a request is closed, removes it with its audit trail. The signed files stay in your files.
The bell tells you when everybody has signed, when a signer declines and when the deadline passes; the last two also come by e-mail. Signers get no message when a request expires.
The signed document
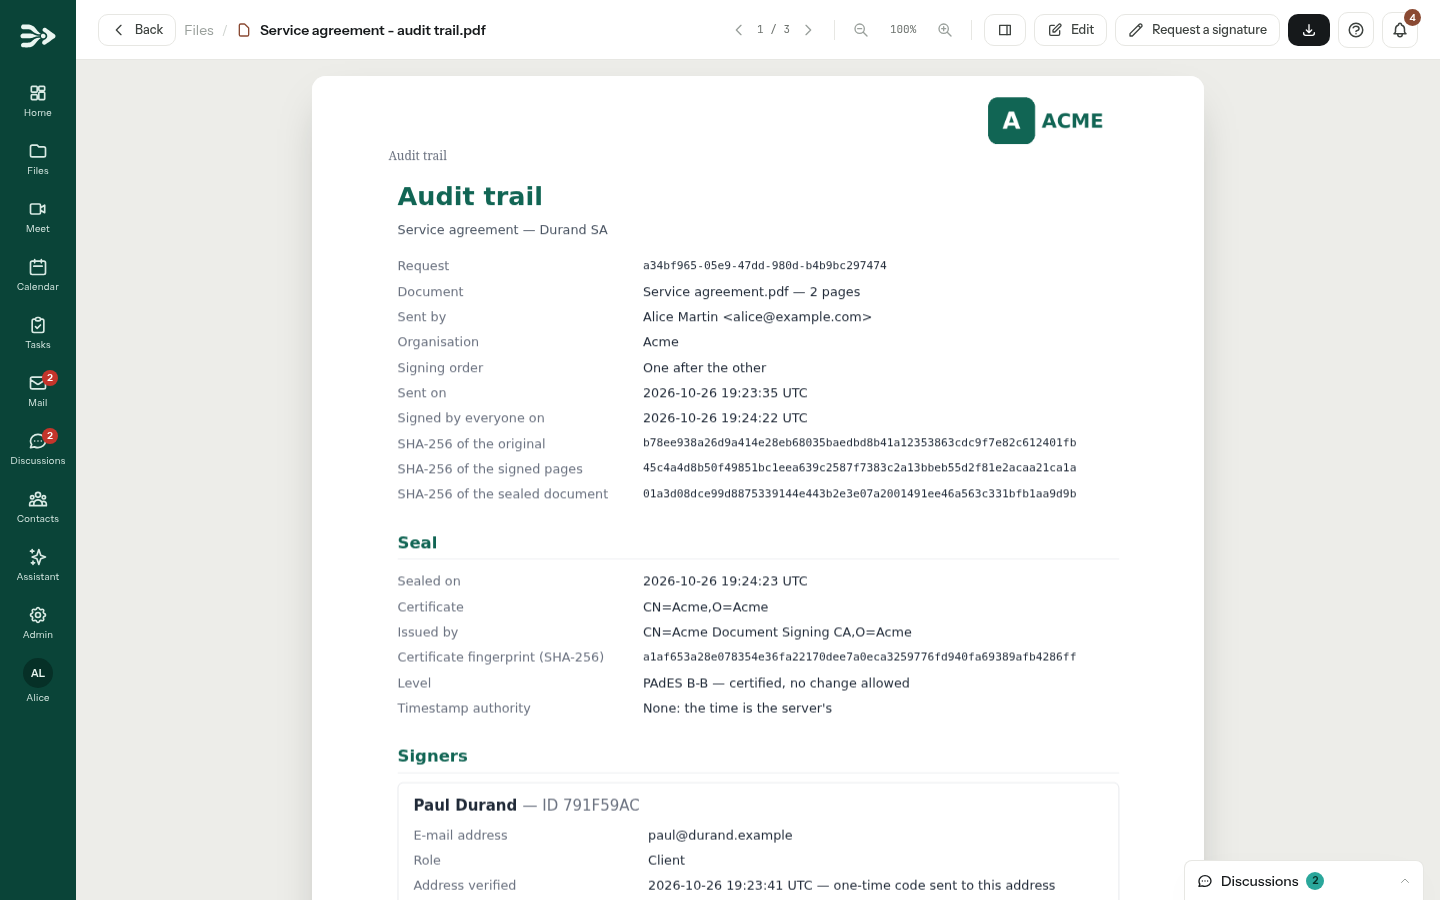
As soon as the last signer has signed, PAFworks writes everybody's signatures and values into the pages — under each signature, a line with the signer's name, address, time and an ID — and seals the document with your organisation's certificate. The seal shows in PDF readers: any later change to the document breaks it.
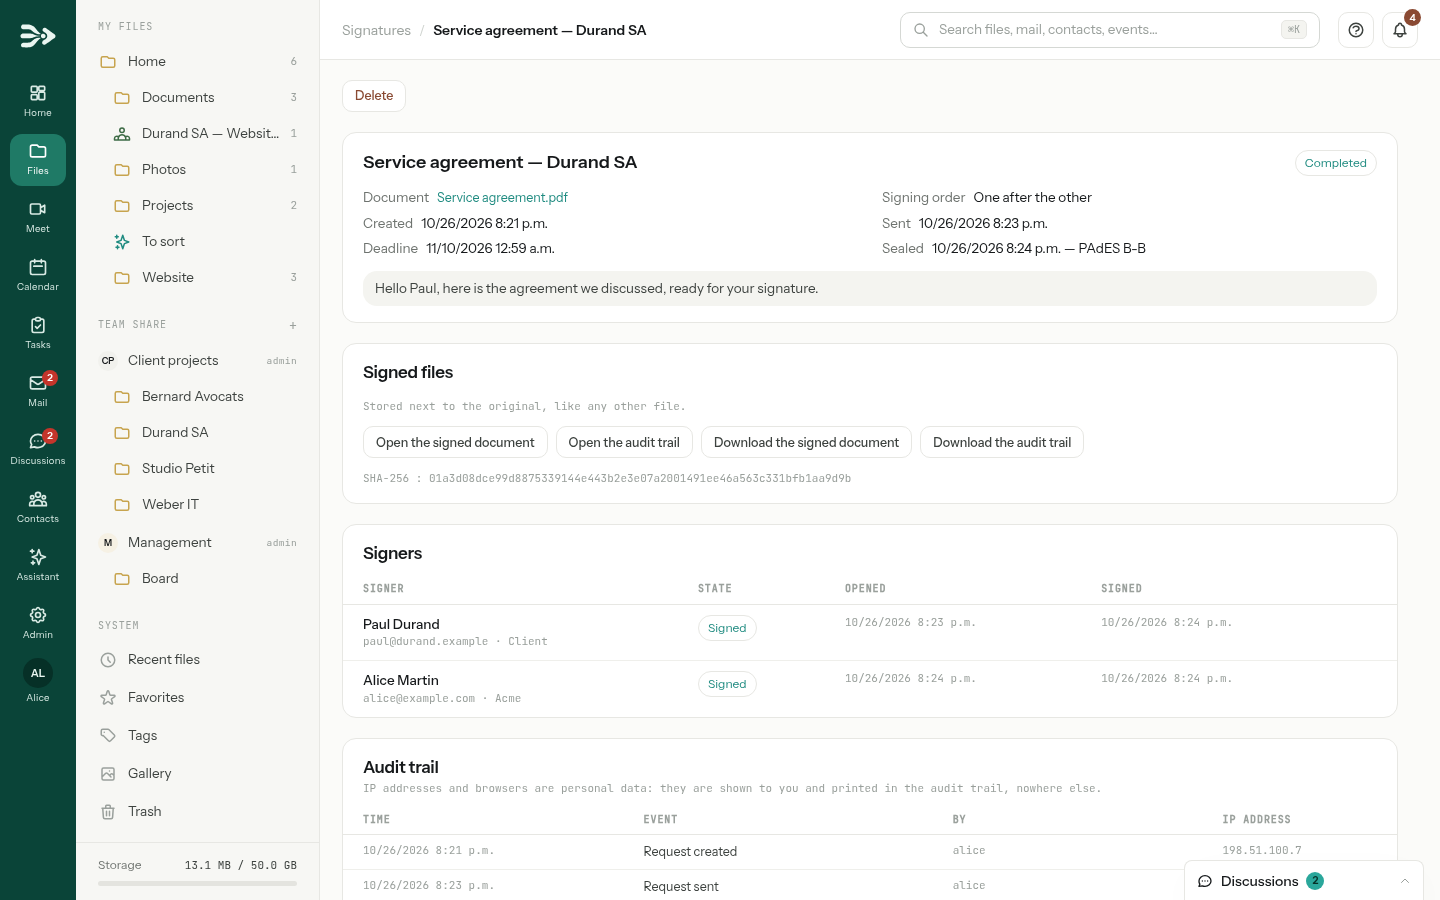
- Two files are filed in the folder you chose, next to the original by default:
Service agreement - signed.pdfandService agreement - audit trail.pdf. The request's page opens and downloads both. - Every signer, and you, receive an e-mail with both files attached. When they weigh more than 10 MB together, the e-mail carries download links valid for 30 days instead.
- The audit trail, sealed too, records the document's fingerprints, the seal and its certificate, and for each signer the verified address, the time of the signature, the consent, the IP address and the browser, then every event of the request.
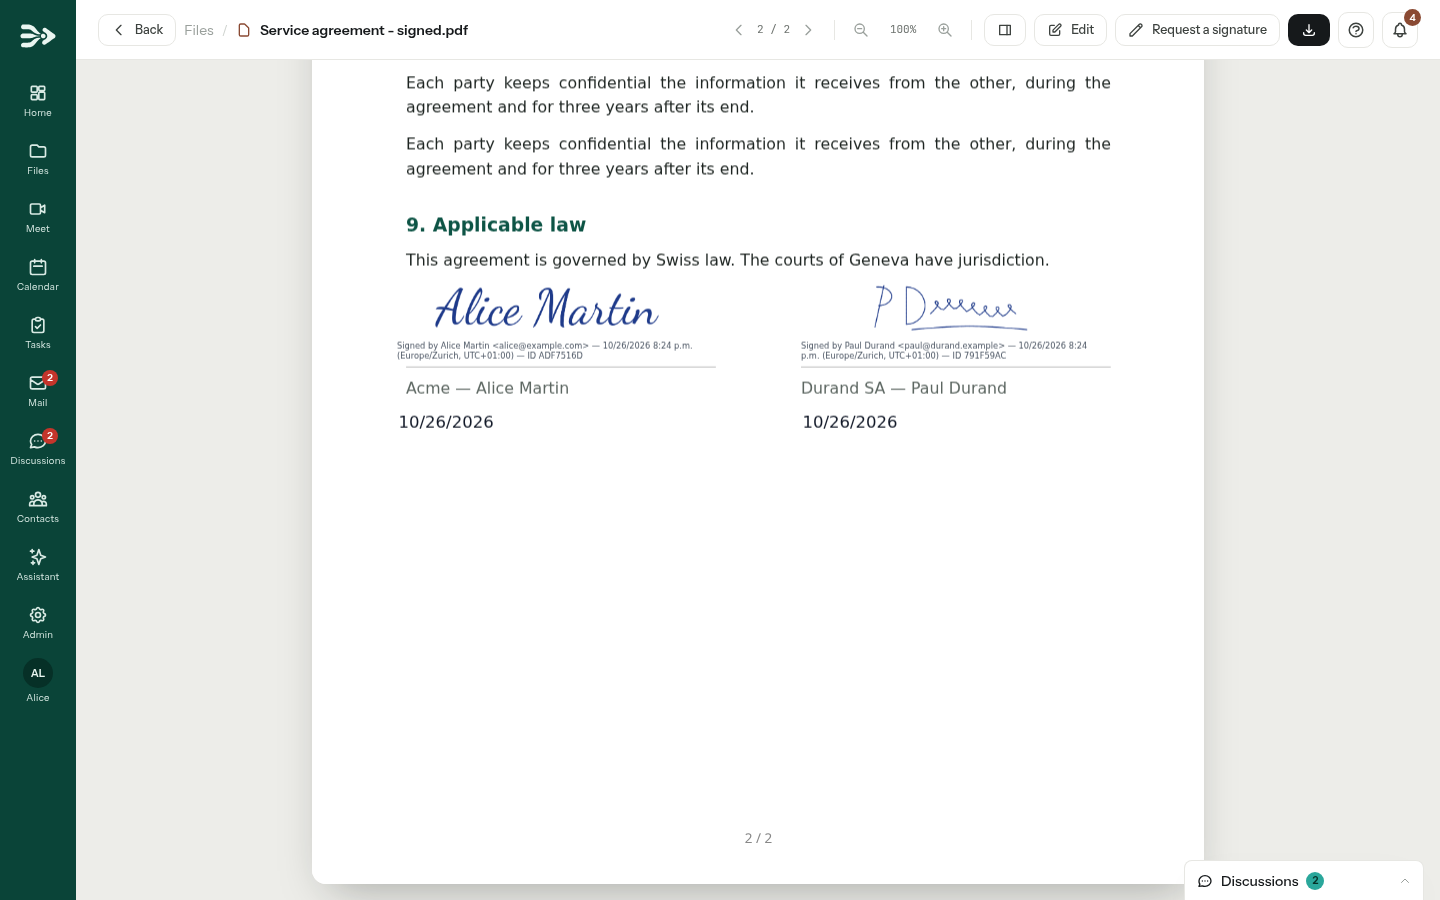
To check a signed PDF later — one you receive back by e-mail, for instance — click Verify a signed document on the Signatures page and choose the file. PAFworks tells whether every signature is intact and whether the document changed afterwards; the file is not kept.
For administrators. The first time a document is sealed, PAFworks creates a certificate for your organisation. PDF readers trust its seal once its root certificate is imported into them; a certificate from a recognised authority is trusted without that step. Both are managed in Admin → Electronic signature, which also sets a timestamp authority, adds the audit trail at the end of the signed document, and can open the verification page to people without an account. The invitations, codes and signed copies go out through the installation's outgoing mail relay: without one, no e-mail reaches the signers.
Sign a PDF yourself
To add only your own signature to a PDF, open it, click Edit, choose Signature, draw or type it, click where it goes and Save. The signature becomes an image in the page: there is no code, no seal and no audit trail. See View and edit a PDF.
Prepare a request with Claude
With the PAFworks connector, Claude can prepare a request for you — the PDF, the signers, their fields, the order and the message — but it never sends it: it gives you the link to the editor, where you check everything and click Send for signature yourself. See Use PAFworks from Claude and other AI apps.
Good to know
- A request takes up to 20 signers and 500 fields. Each signer is one e-mail address, listed once.
- A code is valid for 15 minutes, works once and only in the browser that asked for it; after 5 wrong tries the signer asks for a new one. A new code can be asked for after a minute. Once confirmed, the address stays proven in that browser for 4 hours.
- Links stop working as soon as a request is completed, declined, cancelled or expired. A reminder sends a new link without voiding the earlier ones.
- The deadline runs until the end of the chosen day. A draft keeps the deadline it was given when it was started: check it before sending an old draft.
- Reminders are sent by you only: PAFworks does not remind the signers on its own.
- A request cannot be deleted while it waits for signatures: cancel it first.
- Changing a signed PDF in the PDF editor breaks its seal; the editor warns you before saving.