 PAFworks
 Create a workspace to collaborate on your files
A workspace is a folder you open to people outside your organisation — clients, partners, suppliers. They need no account: they sign in with a single-use code sent to their e-mail address, and each of them gets their own rights.
Workspace, team share or share link?
| To share with… | Use | How people get in |
|---|---|---|
| People outside your organisation, by name | A workspace | A one-time code sent to their e-mail address. Each guest has their own rights and can be removed on their own. |
| Your colleagues | A team share | Their PAFworks account. The folder is in their Files and on their synced devices. |
| Anyone holding a link | A share link | The link, with an optional password and expiry date. |
Step 1 — Create the workspace
-
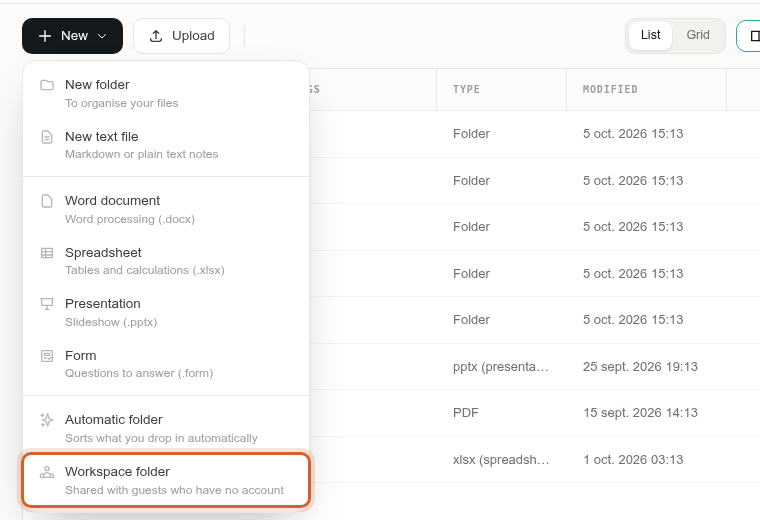
In Files, open the folder where the workspace should go, click New, then Workspace folder.
-
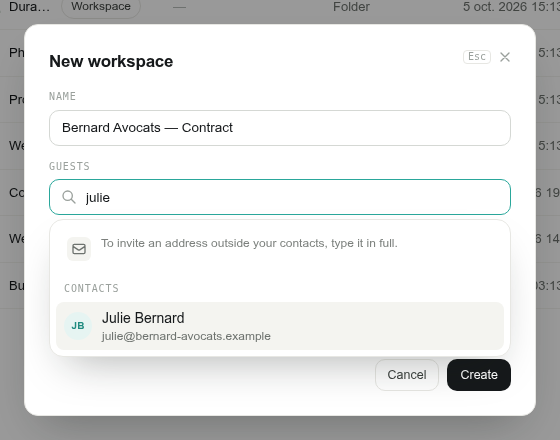
Give the workspace a Name. In Guests, type a name, a contact group or an e-mail address: pick a contact in the list, or type a whole address and press Enter. Anyone can be invited, even if they are not in your contacts.
-
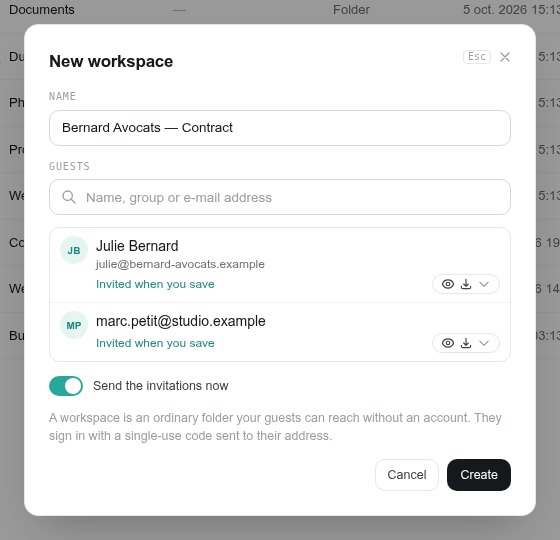
Leave Send the invitations now on, and click Create. Each guest receives an e-mail with a button to open the workspace.
Share a folder that already exists. Open the More actions menu of the folder and choose Convert to a workspace. Everything already in it, subfolders included, becomes visible to the guests you invite.
Step 2 — Set what each guest may do
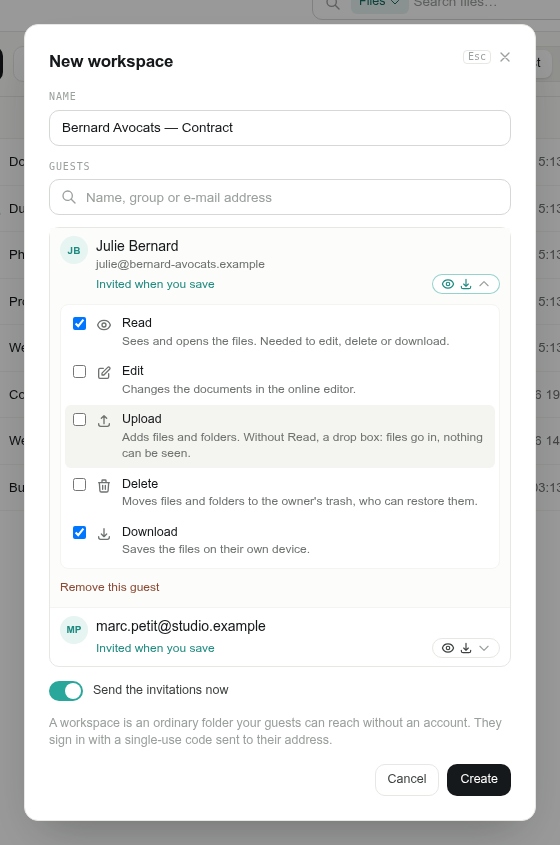
Click the rights pill next to a guest to tick what they may do. New guests can read and download.
| Right | What the guest can do |
|---|---|
| Read | See and open the files. Needed to edit, delete or download. |
| Edit | Change the documents in the online editor. |
| Upload | Add files. Without Read, the workspace is a drop box: files go in, nothing can be seen. |
| Delete | Move files to your trash, from where you can restore them. |
| Download | Save the files on their own device. |
Step 3 — What your guests see
-
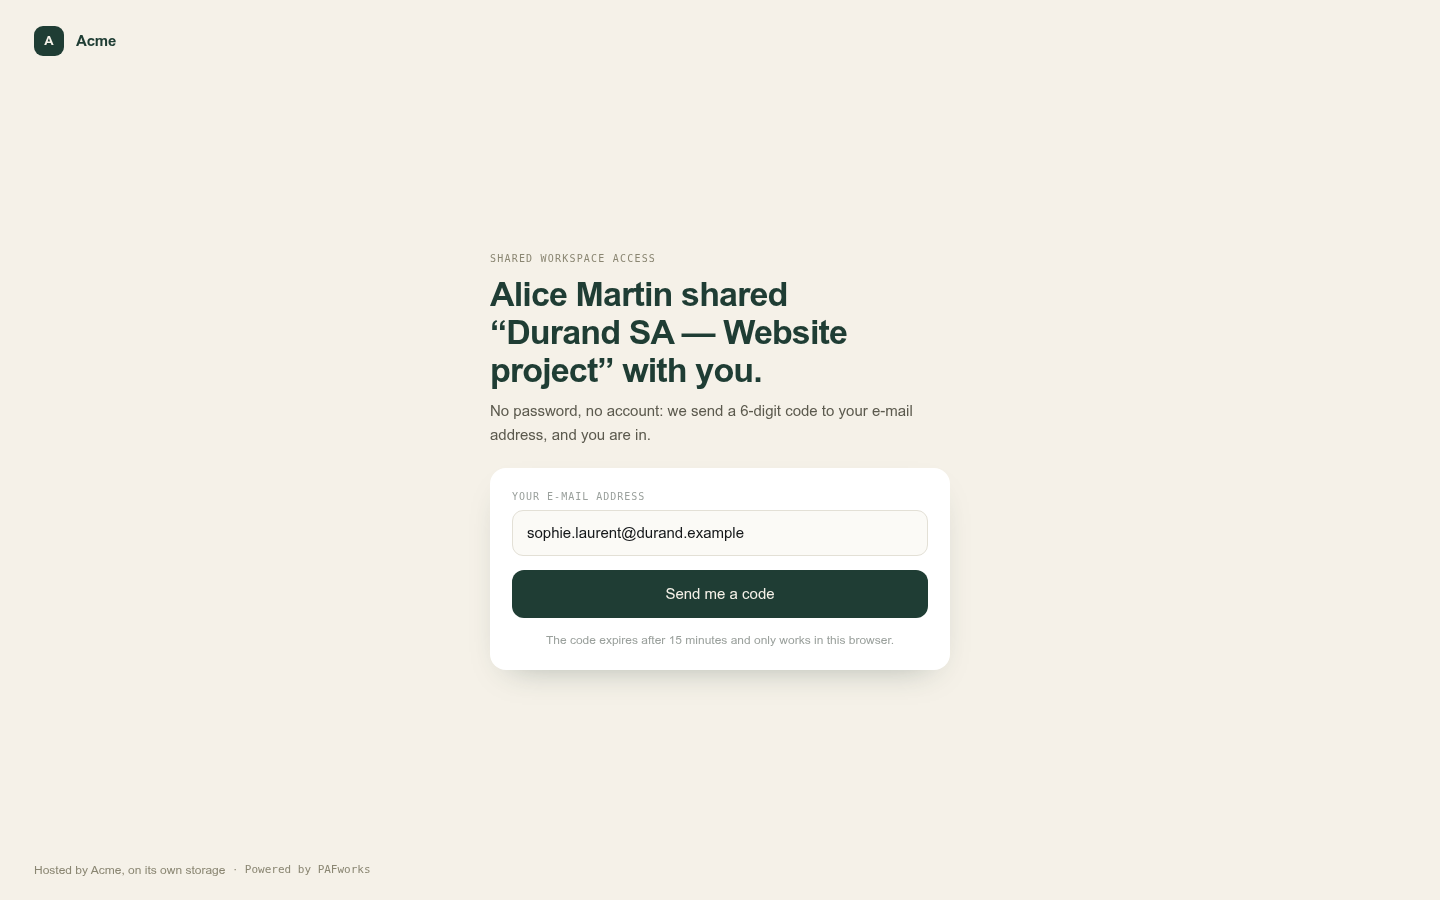
The guest clicks Open the workspace in the invitation e-mail. The page shows their e-mail address: they click Send me a code.
-
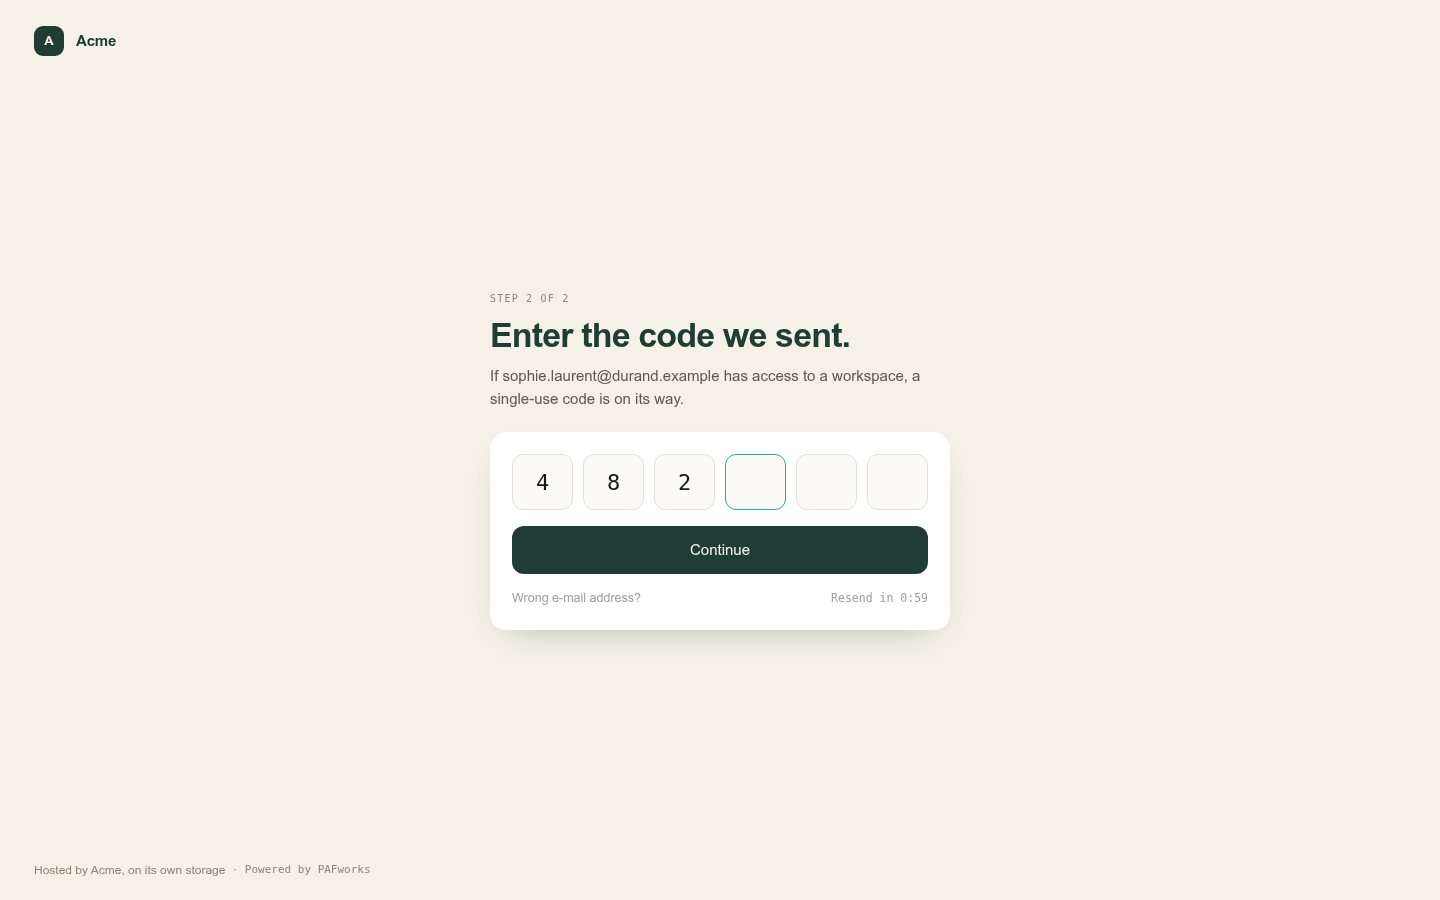
They type the 6-digit code received by e-mail and click Continue. No password, no account.
-
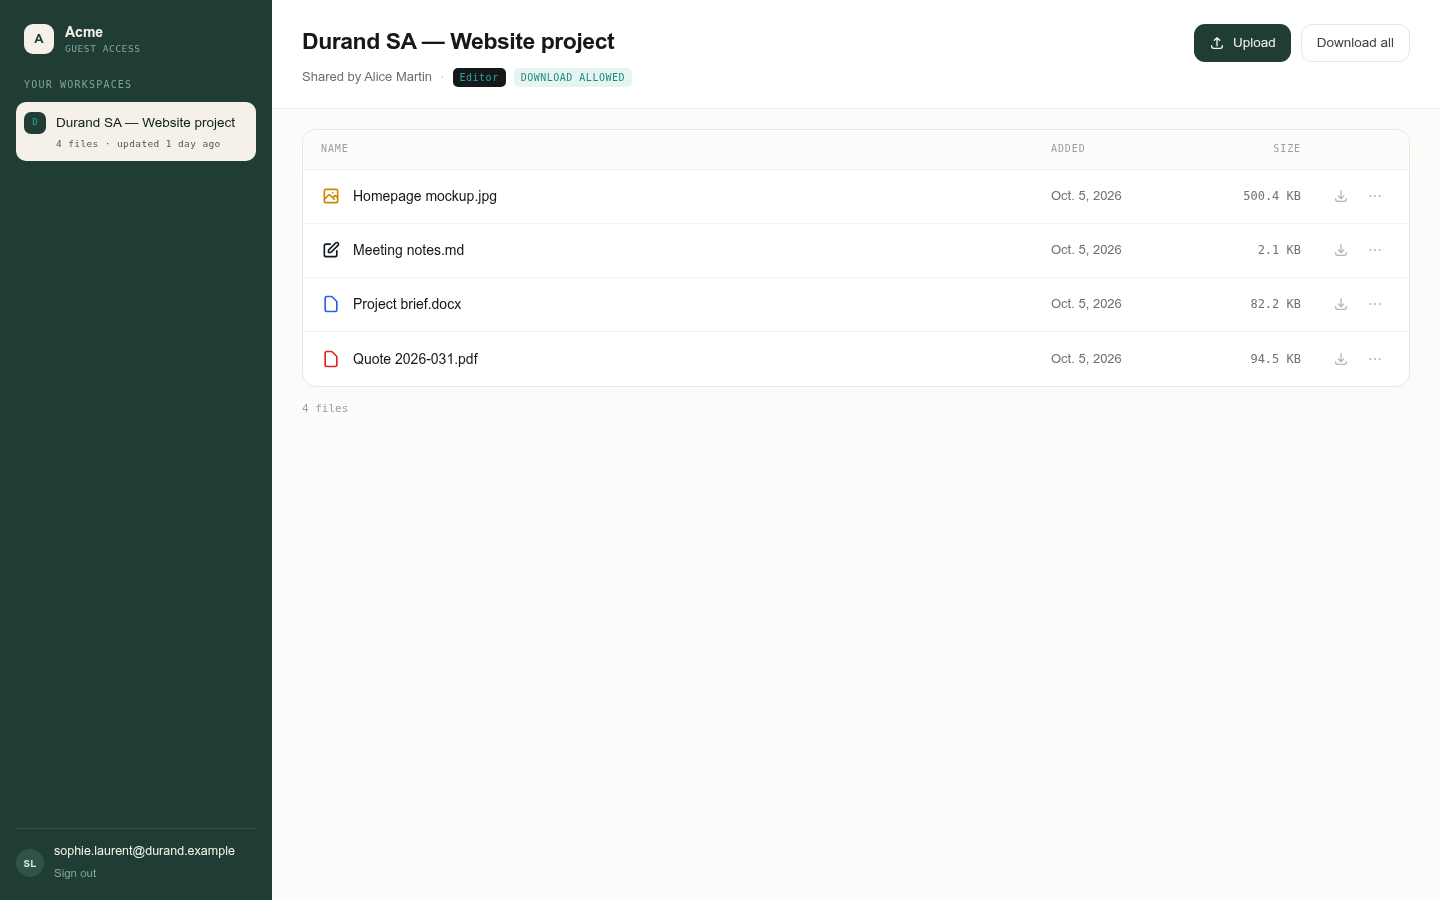
The workspace opens. Depending on their rights, the guest can open, download and upload files (with the Upload button or by dragging files onto the page), download everything at once, and edit office documents online.
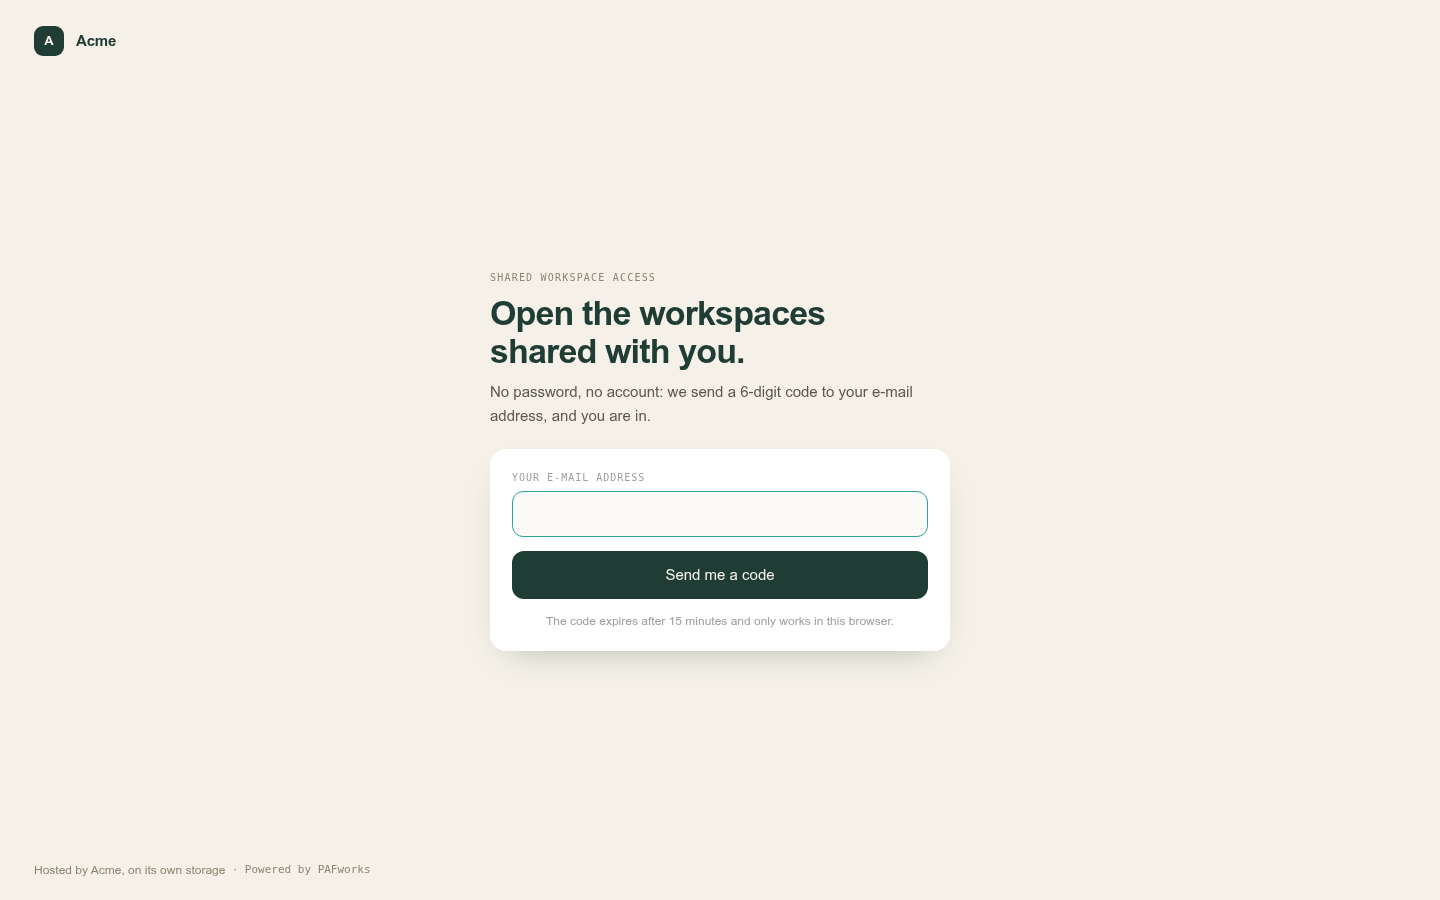
A guest who lost the invitation can go to the sign-in page of PAFworks and click Sign in as a client, or open https://cloud.example.com/w/access/: after typing the e-mail address and the code, they find every workspace shared with them, whoever shared it.
Work together
- Guests add files: a file with the same name never replaces yours, it is renamed.
- Office documents (Word, Excel, PowerPoint, OpenDocument) open in the online editor; guests with the Edit right can change them, at the same time as you.
- You are notified when a guest adds or updates a file, in the bell at the top right, and by e-mail if you chose so in your notification settings.
- Previous versions of every document are kept: restore one from the details panel of the file.
- Your team works in the folder like in any other: comments, versions, activity, the Markdown editor.
Manage the workspace
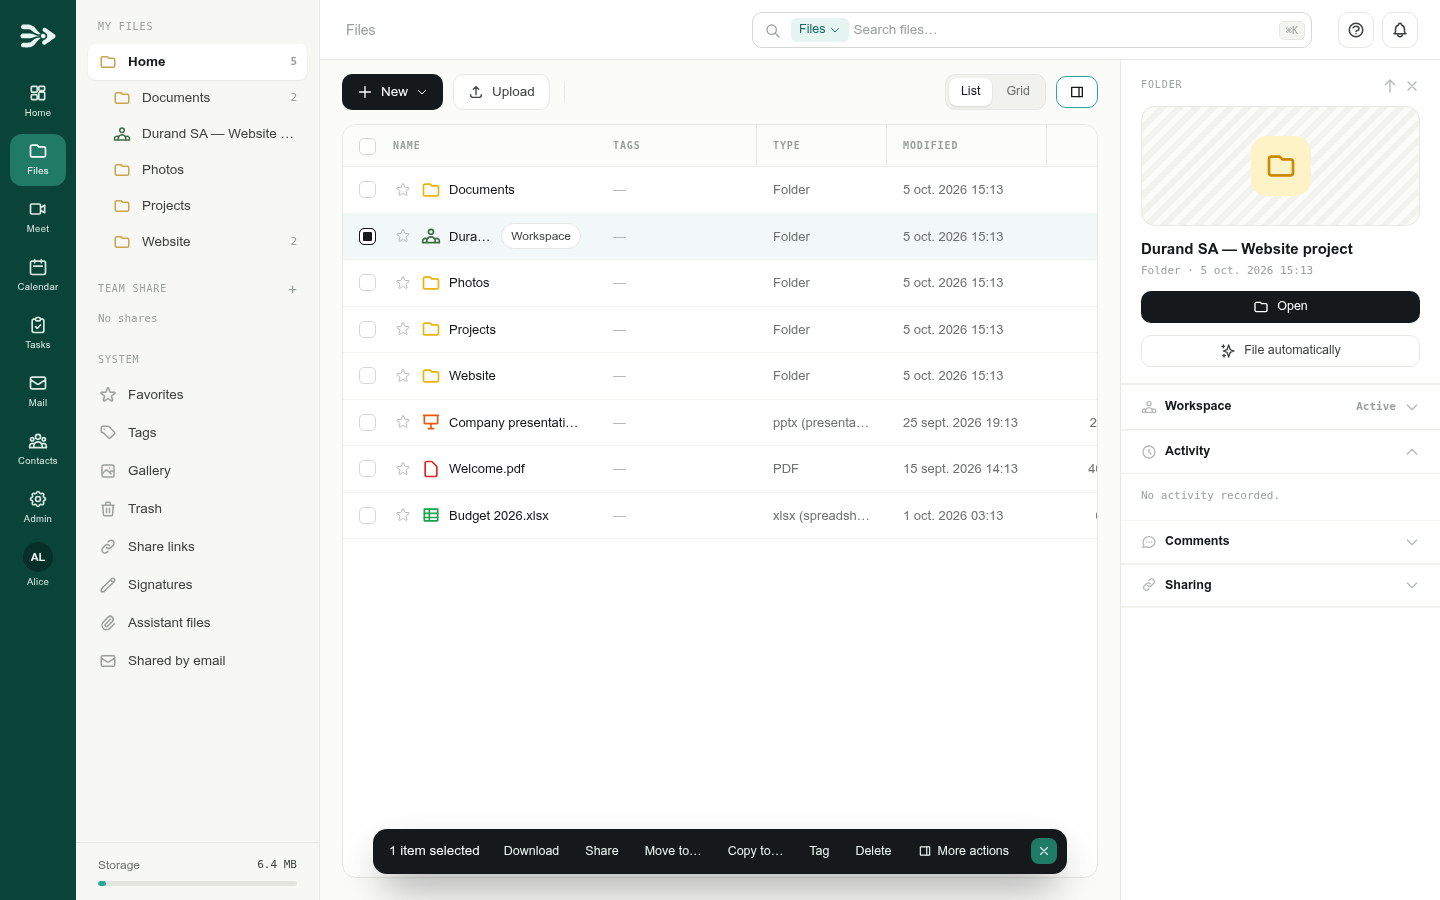
A workspace has a green people icon and a Workspace tag in Files. Select it (or open it) and click Show the details: the Workspace section of the details panel holds all its settings.
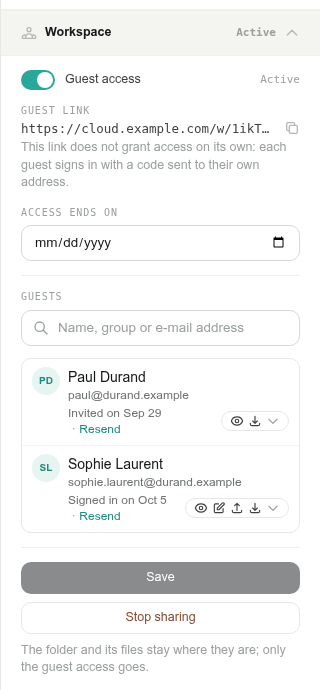
- Guest access: pause the workspace at any time, and turn it back on later; the guest list is kept.
- Guest link: the address of the workspace. It grants nothing on its own: every guest still signs in with a code sent to their own address.
- Access ends on: a date after which guests can no longer get in.
- The guest list: add or remove guests, change their rights, and see whether each one was invited or has signed in. Resend sends the invitation again.
- Save applies your changes and sends the invitations of the new guests.
- Stop sharing removes the guest access; the folder and its files stay where they are.
Invite your colleagues too
Guests are people outside your organisation. To work on a workspace with your colleagues, create it inside a team share: every member of the team share sees it and is notified of the guests' changes.
Team shares are created by an administrator: in Files, the + next to Team share opens New team share, where the administrator names the folder and adds people or groups with Read, Write or Admin rights.
Good to know
- A code is valid for 15 minutes, works once, and only in the browser that asked for it. A guest stays signed in for 12 hours.
- A workspace cannot contain another workspace, and your whole home folder cannot become one.
- Moving a file into a workspace asks for confirmation, since its guests will see it.
- What a guest deletes goes to your trash, where you can restore it.
- When the workspace folder goes to the trash, the guest access closes; restoring the folder reopens it.